This Podi idly is more for adults, as it has onions and spicy podi spread over the idly. When i saw this podi idly recipe on a TV show, i instantly tried it on the same day. We all found this a different and  a tasty way to eat idly, than always opting for chutneys as sides.
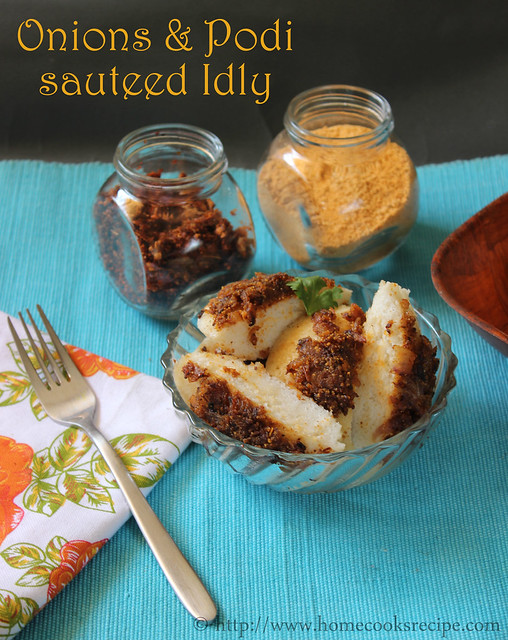
Onion and Podi sauteed idly

One of the reasons for me to resume blogging is because of these cute little bottles gifted to me by my very special friend. she kept on insisting me to get back into blogging. Love you a lot Dear!
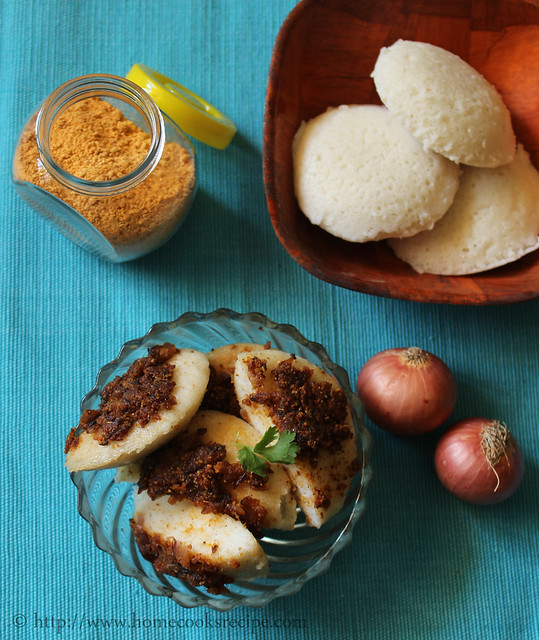
Podi Idly with sauteed onions

My most favorite is podi idly. I was in boarding school for 2 years. Food there will not be tasty. even though we are supposed to eat, whatever is kept on our plate. if we do not eat, we will get punishments like kneeling down or cleaning work on weekends. those days my mom and my ammumma's podi came as a life saver for me. i would eat 3 idly's with my podi.


This podi idly recipe needs onion, podi and ghee. I will share the idly milagaai podi recipe later. but as of now you can try with your idly podi.


                                                          Podi Idly

Ingredients:

Ghee / Butter - 1 tsp + 1 tsp
Idly - 3
Big Onion - 1
Idly podi - 3 or 4 tsp's
finely hopped corriander leaves - 2 tsp's (optional)

Method of Preparation:
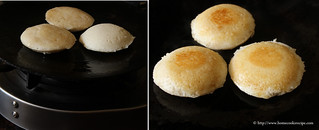
pi1

Heat a dosa tava. add 1 tsp ghee. place the idy in the centre and roast the idly in slow flame for about a minute till you get a light golden crust on the base of idly. likewise flip the idly and roast the other side too. Remove the roasted idly to a plate.
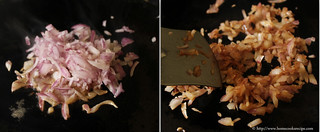
pi2

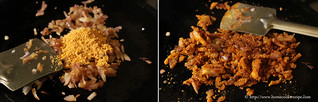
Add 1 tsp of ghee to the tava in slow flame, add finely chopped onions and saute it till it turns translucent.
pi3

In slow flame, add in the idly milagaai podi and mix well with the onions. add corriander leaves and mix. This should all get done less than a minute. else the podi and corriander leaves will get browned.
podi idly

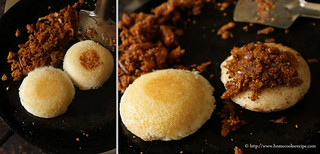
Switch off the flame and spread the onion podi mix over the idly on one side or either side.


Serve the Idly hot. I bet you will like this, if you like podi idly.

This stuffed puri is a famous north indian break-fast. Bedmi puri is between kachori and puri, as the stuffing is made with urad dal. I eyed on this puri from tarla dalal's cookbook. even i made it once long back, me and hubby liked these puri's a lot! Who would say no to a healthy puri like this? when i tried out these puri's last saturday, i clicked pictures of these lovely puri's to share with you all.
 
Bedmi puri

These stuffed puri is normally served with aloo sabzi. but i served with curd and pickle, like we serve stuffed paratha's. it also paired well with the puri's.

Urad dal stuffed puri

Try these stuffed puri for a week end break-fast. sure your family will like it. if you are serving for kids, reduce the dry red chilli and pepper in spice mix, so that they can also eat these healthy stuffed puri!

home made bedmi puri


                                                             Stuffed Urad dal puri
makes- 8 - 10 puri's
soaking time - 4 hours
preparation time - less than 45 mins
recipe from tarla dalal

Ingredients:

To fry the puri - 1 and 1/4 cup sunflower oil

For the dough:

Wheat flour - 1 and 1/4 cup
Nigella seeds / karunjeeragam / kalonji  - 1/2 tsp
Salt - 1 tsp
Water - 1 cup (approx. to knead)
Oil - 1/2 tsp

For the stuffing:

Urad dal  / Split black gram - 1/2 cup
Oil - 1 tsp

Dry roast and ground the following into a corase powder: (spice mix)

Corriander seeds - 1 tsp
Dry red chilli - 2
Pepper - 5
Saunf / sombu - 1 tsp
Cumin - 1 tsp

Method:

Soak the split black gram / urad dal / udacha ulundhu with skin in water for about 4 hours.

To prepare the dough, take wheat flour in a large bowl, add salt and nigella seeda and mix with the flour. keep sprinkling little water and knead them all together into a pilable dough. add 1/2 tsp oil towards the end of kneading and knead well. the dough should be little tight than we knead for  chapathi/phulka. Divide the dough into 8-9 balls. keep aside.

Dry roast the corriander seeds, dry red chilli, pepper, saunf and cumin. grind the roasted one's into a coarse powder.

Drain the soaked dal completely without water and grind them coarsely in your mixer. sprinkle little water if needed. add salt to taste and grind the dal coarser.

Heat 1 tsp oil in a pan, add the coarsely ground urad dal and the spice mix and mix well. mix them in medium flame for about a minute. the urad dal tends to stick to the pan, anyways make sure the mix is dry and well mixed with the spice mix. remove from flame and let it cool. once cooled divide the urad dal mix into small ball's that has to be stuffed.

stuffing for bedmi puri

Now roll the wheat dough into a thick 3'inch diameter round and place the urad dal stuffing in centre and fold all the edges of the dough to cover the urad dal stuffing. dust it with little flour and roll them lightly into a medium shaped puri. similarly do the stuffing and roll the other puri's.

bedmi puri rolled dough

Heat 1 and 1/4 cup of oil in deep pan and fry the rolled out stuffed puri's. fry till they reach golden brown in colour. fry the both sides of the puri. serve the puri hot with aloo sabzi or with curd and pickle.

bedmi puri

Notes:

I used skinned split urad dal. as skinned dal is good, you can also use it. you can also try it in whole urad dal de-skinned.

Make sure the urad dal is grinded coarsely with little water, only then the stuffing will be intact when rolling the puri.


First i hate to name this has Appam. we call it as ஆப்பம்(aappam), in english it may be read / means burp. so without heart i call it appam now! My great grand mom used to make appam with coconut toddy (kallu) for us. the flavor and taste of those appam is just unbeatable. forget the drowsiness after eating appam. and just for the drowsiness, we kids won't be fed appam on school days!! 

On our recent trip to kerala, i had appam for break-fast and also for dinner all the 2 days we stayed. i like these soft white bowl shaped appam so much! what i have made here is, appam with yeast. yeast is used as a substitute for toddy. usually fresh toddy should be added to the appam batter, which naturally ferments. it should be allowed to ferment for at least 8 hrs. In my experience, even if you are preparing appam without yeast, the batter should be allowed to ferment for above 16 hrs. only then you can get perfect appam's.


How to eat the appam is, sprinkle 2 or 3 tsp's of sugar in the centre of the appam and pour coconut milk/ just plain milk, let the appam soak for few seconds and eat! It will be a divine break-fast!

appam served with veg stew and milk 


Appam with Yeast Recipe

Prep Time30 mins 
Cooking Time: 05 mins  
Serves20
Recipe CuisineIndian
Recipe TypeBreakfast

Ingredients:

  • Raw rice - 2 cup's (400gms)
  • Par boiled rice / Idly rice - 2 cup's (400 gms)
  • Urad dal - 1/2 cup (50 gms)
  • Fenugreek - 1/4 tsp
  • Luke warm water - 1/4 cup
  • Active dry yeast - 1 tsp
  • Sugar - 1 tsp
  • Rock salt / kal uppu - 1 tsp


Method:

Soak the raw rice, par boiled rice, urad dal and fenugreek in water for about 4 hours. Grind them into a very smooth and thin batter(not very thin actually). the grinding time may take from 45 minutes to 1 hour when grinded in grinder. Once the grinded appam batter is ready, transfer the batter to a clean vessel and close it with its lid and let the batter to ferment for overnight or 12 hours. 


After fermentation, its time to add yeast and let it ferment for the second time. so prepare for this second fermentation, ahead of 2 hrs of preparing appam. In a small mixing bowl, mix yeast, sugar, rock salt in Luke warm water and stir well with a spoon so that the yeast get's dissolved. close the mixing bowl with a plate and let it rest for about 10-15 minutes. this is to prove the yeast for its activeness. once the yeast mixture turns frothy, add it to the fermented appam batter and stir well. Now let the appam batter ferment for the second time for about 1 and half hrs to 2 hrs. once the batter ferments. its ready to make appam.

                  this pic is taken after first fermentation. it actually ferments more after adding yeast!


Mix little water, if the batter is too thick. heat a appa kadaai, i use my non-stick appam pan. smear the pan with a drop of oil. with a sliced onion, just spread the oil on sides of the pan(repeat this when preparing each and every appam). Pour 2 heaped ladle full of appam batter in the center of the appa kadaai / pan and swirl the kadaai / pan, this makes the batter spreading towards the sides of the pan. close the pan with its lid. let the appam get cooked in high flame for just a minute.

if you want the centre of the appam to be thick(like in the above pics) and the sides thinner, you should add another ladle of batter, this makes the excess batter get into the center. but you have to put the flame in medium and close the appam pan. it may take more than a minute for the appam to get cooked. you can test, by touching the center of the appam. if it sticks, its not cooked! then wait for some more time.

The left over appam batter can be put back in fridge, actually it ferments again and that gives still good appam 's in the next batch. do not forget to finish up the batter in 2 day's. its not like our idly batter, which keeps good for 5-7 day's.

Notes:

If you want to prepare appam without yeast, just let the appam batter ferment for about 16 hours. take half a cup of water, add 1 tsp sugar, 1 tsp rock salt and 1/4 tsp of cooking soda and mix well. now add the mixed water to the fermented batter and mix well. let the batter rest for 30 minutes before you start making appam.

You can also add Instant yeast and add it to the batter, without proving the yeast. if using coconut toddy, add 1 cup of toddy, for this recipe.

Me and hubby love pesarattu. whenever we eat out at a andhra hotel, we order this. I love to prepare pesarattu on weekends as it involves less job and extra credits goes for this healthy break-fast. when you have little of last batch of the dosa batter, mix it along with pesarattu batter. that yields good dosa's.


I used to add raw rice for making the batter and have made thick pesarattu like our adai before. somehow, we liked only the thin one's. so i started to follow this simple recipe.


I just love to eat these pesarattu without any side-dishes. the onions and green chilli on every bite will simply be good. Pesarattu is normally served with upma. It can also be served with simple coconut chutney and sambhar. 


Pesarattu

yields- 10 thin pesarattu
soaking time - overnight or 3 hrs
preparation time - less than 15 minutes


Ingredients:
  • Whole moong dal - 1 cup / 200gms (soaked in water overnight or 3 - 4 hrs)
  • Green chilli - 2
  • Cumin - 2 tsp
  • Ginger - 1' inch size
for topping:
  • Onion - 1 finely chopped or 10 small onions finely chopped.
  • Green chilli - 1 finely chopped
Method:
Wash and soak the whole moong dal in water for about 3 - 4 hrs or overnight. if soaked for overnight, it may also sprout and that makes the pesarattu more nutritious.
Grind the soaked moong dal along with green chilies, ginger, cumin, 1/4 cup of water & salt to taste into a smooth and fine batter.
Now the batter is ready to make pesarattu. yes you need not ferment! Heat a dosa tawa, take a ladle full of batter and make dosa's. if you prefer thin make thin dosa's.
Drizzle oil on sides, if you prefer toppings, add the finely chopped small onions and green chilli over the dosa and wait for a minute and flip the dosa, to let the other side of the dosa to get cooked. after half a minute remove the dosa to serve.
          Serve plain or with coconut chutney or sambhar.

Notes:

  1. As mentioned, you can mix this pesarattu batter along with left over dosa batter and make dosa's.
  2. If serving pesarattu for kids, make sure to reduce one green chilli, it will reduce spice.


Tandoori idly, I have eaten this idly more than dozen times. i have seen it in menu's only in pondicherry hotels. right from my childhood, it is my favorite dish. though I wanted to share the recipe for tandoori idly years back, the time came just today.


Tandoori means marinating with yogurt and spices, and then cooking in a tandoor oven. so the idly has to be marinated in curd and tandoori masala, after marinating, the idly should be fried. then gravy should be poured over the fried idly. though fried, the idly turns soft on soaking in the gravy. according to me, it’s pointless in frying the idly. also i hate to fry something well cooked. if you prefer frying idly, do that.


You can call this dish as a mock tandoori chicken. the idly gets soaked well in the gravy and the flavor and taste will be so good. never try this with left over idly. even in that case, reheat the idly and pour the gravy over it.


Tandoori Idly

Prep Time10 mins 
Cooking Time: 25 mins  
Serves3
Recipe CuisineIndian
Recipe TypeBreakfast

Ingredients:

Idly – 8
Onion – 1
Tomatoes – 2
Ginger – Garlic paste – 1 tsp
Cashews – 5
Oil – 1 tbsp
Salt to taste
Water – ½ cup
Masala powders or use tandoori masala – 2 to 3 tsp
Turmeric powder – ¼ tsp
Chilly powder/Sambhar powder/Madras curry powder – 1 tsp
Kashmiri chilly powder – 1 tbsp
Coriander powder – 1 tsp
Cumin powder – 1 tsp
Garam masala – 1 tsp
Kasuri methi – 2 tsp


To Garnish:

Coriander leaves – 1 tbsp (finely chopped)
Cashews or peanuts – 1 tbsp (finely chopped)

Method:

Prepare idly and cut them into half. with a help of fork or tooth pick prick few holes on the idly.

To prepare the gravy, heat a pan, add oil, and then add chopped onion and sauté till it turns translucent. then add the chopped tomatoes and sauté till it turns soft. then add ginger garlic paste and sauté till the raw smell goes off.

Now start adding tandoori masala or the masala powders one by one, turmeric, chilly powder, dhaniya powder, cumin powder, garam masala and kasuri methi to the pan and mix well. once the masala powders are well mixed with onion and tomato let the flame be in slow, and keep mixing, so that masala’s do not get sticked to the bottom of the pan for about 1-2 minutes till the raw smell of the masala goes off. remove the pan from flame and let it cool. add cashews and little water to the masala’s and grind them into a fine paste.

Heat another pan, add the grounded masala’s and add water as per the consistency you want. add salt and chilly powder as per your taste and let it boil. once it boils for 2-3 minutes remove the gravy from flame.

Once the gravy is ready, place the idly on plate and pour the gravy over it, cover the idly with the gravy. sprinkle some chopped cashews or peanuts over and finally add chopped coriander leaves. do not miss this; it makes the dish visually so impressive also a byte of nuts here and there makes the difference!

Serve with lemon wedges, onion slices or onion raita.


Notes:

I tell you all an idea, if you have left over idly from morning breakfast, prepare more amount of gravy, so that you can use it for this tandoori idly for evening snack and also use up the gravy to prepare aloo masala or pea’s masala or paneer masala for dinner. just add 2 tsp of fresh cream to the gravy at end. it’s done. no one will spot the difference ;)

Also do not use the sour idly batter and make sour idly. this will not work with sour idly. idly should be so soft and fresh.


My son kept asking me, why don't try to make crisp dosa's like in hotels. when i was able to make good dosa's today, i cant postpone in sharing the recipe with you. so on breaking my month long gap, here i am. I got a Happy News to share with you all. Yes finally my blog got its own domain name. I am proud and happy looking my blog with .com extension. Thanks to my blog readers and blog friends for all the encouragement. 


Coming to this hotel style dosa, got the recipe from Revathi Shanmugam's Tiffin Varieties book. I just gave a try and the dosa's turned out pretty good. When i tasted, it was more like karnataka / mysore style dosa in taste. the colour of the dosa is nice golden colour, which may be because of adding sugar. This dosa batter will work fine, if you are planning masal dosai for your guests.


Hotel Dosa Recipe

recipe from revathi shanmugam's tiffin varieties
makes about 25 dosa's
soaking time : 4 hrs
fermentation time: 8-10 hrs.
------------------------------------------------------------------


Hotel Dosa Recipe

Prep Time40 mins 
Cooking Time: 05 mins  
Serves6
Recipe CuisineIndian
Recipe TypeBreakfast


Ingredients:


Par boiled rice / puzhungal arisi - 2 cup's
Raw rice / pacha arisi - 1/2 cup
Urad dal - 1/2 cup
Toovar dal - 1 tbsp
Chana dal - 1 tbsp
Fenugreek - 1 tsp
Sugar - 1 tsp
Salt - 1 tbsp


    Method:

    Wash and soak the rice, dal' s, and fenugreek together. soak them in water for about 4 hours.

    After soaking grind them into a smooth batter. add little water while grinding to get the smooth batter. You can use your mixie to grind. i used mixie and it just took 5 minutes to finish the grinding work. transfer the batter to a big bowl, so that it has space when the batter doubles on fermentation. add salt to the batter and let it ferment on your kitchen top for overnight or 8-10 hours.

    After fermentation mix the batter well and add sugar to the batter and give a mix.

    Heat a dosa tava, sprinkle few drops of water to find the tava got heated up or not. the water should sizzle and evaporate soon. then add a drop of oil and use a slice of Brinjal or a potato to spread the oil on the tava.

    Pour 2 heaped laddle full of batter to the centre of the tava and make a big circle with the help of laddle. spray oil to the sides of the dosa and let it turn golden colour and flip the dosa so that the other side is also cooked. it takes 90 seconds for each dosa to be cooked at high flame.

    Serve hot with sambhar or chutney. i will soon share my hotel sambhar recipe with you.


    Its such a easy recipe, of soaking rice and dal's together and grinding them together, instead of grinding separately.  also the dosa turns out crispy and comes in nice golden colour. but eat the dosa hot. its not good, when the dosa gets cooled down!!

    One of my friend had tried twice this dosa, after i had posted here. it seams her family loves this dosai!


    Maravalli kizhangu / Tapioca is a seasonal root. My Dad used to tell that, maida is obtained from this root. even i learned from web that sago(javvarisi) and arrowroot are obtained from this veggie. anyway i am not sure about all this. At home mom used to steam this kizhangu and give for us with sugar.

    maravalli kizhangu dosai served with varamilagaai chutney(recipe below) and grand sweets chettinad poondu kuzhambu.


    I have been craving to try vadai with maravalli, finally i tried it today. it was so different and crispy vadai i have ever ate. before i go with vadai, i wanted to share dosai and idli made with this maravalli kizhangu.


    Maravalli kizhangu dosai


     serves : 4 
     soaking time : 4 hrs.
    fermentation time : overnight   
    preparation time: 10 mins.
    this batter can be used to make idli and dosai.
    recipe given is to grind using wet grinder, you can reduce the quantity into half, if you want to grind using mixie


    Ingredients: 
    • Par boiled rice - 1 cup
    • Raw rice - 1 cup
    • Urad dal - 1/2 cup
    • Maravalli kizhangu - 1 big one(peeled and grated) / 2 cup's

    Method:

    1. Soak the par boiled rice and raw rice together in water for about 3-4 hrs. soak the urad dal in water for about one hour.

    2. Peel the outer skin of maravalli / tapioca and wash it thoroughly. then grate with the help of grater or chop them into small pieces.

    3. Now first grind the urad dal with 1/2 cup of water sprinkled in between while grinding, just as we grind for idli/dosa's. after 30 minutes, add the soaked rice and grind finely. sprinkle water in between. finally add the grated maravalli kizhangu and let it grind into a smooth paste. together it will take about 45 minutes to 1 hour for grinding in your wet grinder.

    4. Let the batter ferment for about 6 hrs. dilute the batter with salt required for making dosa, add salt to the batter and mix well.

    5. Now make thin dosa's  and serve with varamilagai chutney.


    Maravalli kizhangu Idli:

    I also made idli's which turned out so soft and fluffy.


                                               Varamilagaai chutney / Kaara chutney


    serves : 2 
    preparation & 
    cooking time : less than 15 minutes

    Ingredients:

    • Onion - 1
    • Tomato - 1
    • urad dal - 1 tsp
    • channa dal - 1 tsp
    • mustard - 1 tsp
    • grated coconut - 2 tbsp
    • Dry red chillies - 3
    • Oil - 1 tsp

    Method:

    1. Heat a tsp of oil in a pan, add  mustard and let it splutter, add urad dal, channa dal and roast till it turns golden in colour.

    2. Then add onions and saute till it turns translucent. then add tomatoes and saute till it turns mashy. add salt to taste and finally mix the grated coconut and remove from flame.

    3. Cool them all and grind into smooth chutney with little water.


    Idli's were so soft and fluffy. Try out this root veggie, which is very good for health too. Maravalli kizhangu can just be steamed and eaten with sugar or salt. you can make vadai, dosai, idli, adai with this kizhangu. i guess puttu can also be made. such a versatile healthy root vegetable..

    This is one of our favourite chutney's. I learned the recipe from aval vikatan. I also clubbed Bharathy's recipe with aval vikatan and got the recipe of this yummy Onion Thokku.


    This Recipe Yields about 1 cup.
    good enough for 4 adults.

    Ingredients:

    Small Onion's - 1 cup / 15 nos.
    Big Red Onion - 1
    Tamarind - 1 small lemon size
    Turmeric Powder - a pinch
    Chilli Powder - 3 tsp's
    Oil - 3 tbsp's

    To Dry Roast and Grind:

     Mustard - 1 tsp
     Cumin seeds - 1/2 tsp
     Asafoetida - 1/2 tsp
                                                
    Method:
    1. Dry roast Mustard, cumin and asafoetida and powder it coarsely.
    2. Peel the small onions and Big onion.
    3. Soak Tamarind in 1/4 cup of warm water for about 10 minutes and squeeze the pulp. discard the pulp and use the thick tamarind juice.
    4. Heat 1 tsp of oil in a pan, add small onions and roast them, then add big onions and roast the onions. add salt so that the onions cook fast. once the onions are almost cooked, remove from flame and cool them.
    5. Grind the onions with just 1 or 2 tsp's of water into a coarse form.
    6. Heat the Remaining oil in a Pan, add coarsely grounded small onion's and saute it in oil. add salt to taste, Chilli Powder and the Grounded powder. Give a mix.
    7. Add the Thick Tamarind Juice to the pan and mix well. reduce the flame to medium and keep mixing the chutney for 5 minutes in medium flame, till the chutney gets thicker and leaves oil on its sides.
    8. Remove the chutney to a clean sterlised bottle. you can store this upto a week in fridge.
    Serve this Onion Thokku with Idli, Dosa's.

    I rarely try out new recipes for breakfast. When i saw barley khichdi in a magazine, i found its so easy to make. the best time to try is this summer, isn't it? so went ahead and tried this great healthy breakfast. it came out Good, and what a nice way to have barley in khichdi form..i have tried it twice and loved it so much.

    Breakfast with Barley


    Veg Clear Soup Recipe

    Prep Time05 mins 
    Cooking Time: 15 mins  
    Serves2
    Recipe CuisineIndian
    Recipe TypeBreakfast

    Ingredients:


    Barley - 100gms
    Moong Dal / Pasi Paruppu - 2 tbsp
    Turmeric powder a pinch
    Water - 2 cup's (220 ml)
    Onion - 1
    Green Chilli - 2
    Carrot - 1/2
    Tomato - 1
    Capsicum - 1/2
    Corriander leaves to garnish
    Oil - 1 tsp
    Jeeragam - 1/2 tsp


    Method:

    I didn't soak barley, but you can also soak the barley overnight, drain it and try, just like sabudana(sago).

    Heat Oil in a Pressure Cooker, add cumin, green chilly and saute them. Now add Sliced Onion and saute it along.

    Add chopped Tomato to the onions and mix. also add finely chopped capsicum and carrot and saute well.

    Now add Moong Dal, a pinch of turmeric powder, and the Barley to the Pressure cooker and mix well.
    Add 2 cups of water and stir.  Add Salt to taste. Then Pressure Cook up to 4 or 5 whistles and remove from fire.

    Serve warm, garnish with Coriander leaves.

    Barley Khichdi


    I liked the capsicum, it added a good taste to the khichdi.

    Notes:

    * Just 100 gms of Barley is enough, if you are cooking for two.
    * You can add your choice of vegetables.
    * Barley wont be so soft on cooking, it will be like cooked brown rice, semi-hard in texture.
    * Barley is best for pregnant ladies.


    Two days back i got injured on  my right eye and now every minute i realize the importance of it. or i can also say, iam realising the importance of being healthy without any illness. The injury is not severe and it did not affect any nerves. Thank God! Iam having a light pain and my eyes are feeling heavy. It all happened because of a funny fight, with my kid. Bringing up the kids will be the finest art to learn. isnt it?

    Instant Breakfast

    Apart from that, i always look for Instant Breafast. Its impossible for me to prepare Appam with some curry or Idiyappam with Kuruma or Poori Masala on weekdays. i usually go with idli/dosa with some chutney, bread omlet or some porridge.

    Hubby got packs of aloo powder/flakes. and i could'nt use it other way than using it for cutlets/patties.
    I also cooked aloo kofta biryani with it. if you are a fan of Home Cook's Recipe's in Facebook, you can check its profile picture..

    Potato Cutlets

    Ingredients for Potato Cutlets / Aloo Patties: (makes 5)


    Aloo Flakes - 2 cups or Boiled Potaoes - 2 (mashed)
    Wheat Germ - 1/4 cup (optional)
    Wheat Bread - 2 slices
    Green Chilli - 1
    Corriander Leaves - 2 tsp(chopped)
    Salt to taste
    Oil - 1/4 cup

    Method:

    Mix all the ingredients except Bread slices and Oil. Soak the bread slices in water and squeeze them. add the squeezed bread slices to all other ingredients mixed. mix them all together. sprinkle little water to get them all together. Shape them into Patties shape/ round shape.

    Heat Oil in a Pan. and fry the aloo patties in medium flame, till they turn brown in colour. transfer the fried patties over a tissue.

    Instant Tiffin for Kids

    How i assembled them?

    Cut the Bread slices into round shape. spread some mayyonise over it and place vegetables and place aloo cutlet and them cover it with another round shaped bread.

    * YOU can add grated carrot and boiled peas to the cutlet.
    * Even adding little greens will be a good choice to the cutlet.
    * Place cheese when assembling for kids.
    * Baking the patties will also be a Good choice.

    Iam looking for quick side-dishes for idly, if you want to help me, please suggest me a quick side-dish for idly. I could spare just 10 mins in the morning to prepare a sidee for idli's. if coconut is grated and freezed, then its coconut chutney, and other day is for tomato chutney. Today i prepared this Tomato Gosthu for break-fast. the left over gosthu, was served for lunch, with boiled eggs. such a 2 in 1 dish has to be blogged here isn't it?

    Thakkali Gosthu / Tomato Gojju

    This Tomato Gosthu is the first dish, that i cooked for my father. it took me 45 mins to serve for my father once.  Idly and Tomato gosthu is my favorite during my college days. Now within 10 - 15 minutes, i am preparing this gosthu easily.


    Thakkali Gosthu Recipe

    Prep Time05 mins 
    Cooking Time: 05 mins  
    Serves2
    Recipe CuisineIndian
    Recipe TypeSidedish

    Ingredients:


    Onion - 1 (chopped)
    Tomatoes - 2 (big one's)
    Green Chilli - 1 (slitted)
    Curry Leaves - 1 sprig
    Corriander Leaves - 2 tbsp's chopped
    Oil - 2 tbsp
    Mustard - 1/4 tsp
    Turmeric Powder - a pinch
    Red Chilli Powder - 1/2 tsp
    Water - 1/2 cup


    Method:

    Chop the Onion and Tomatoes.

    Heat a Pan, add oil and heat it. add mustard and let it crack. add curry leaves & green chilli and saute them.

    Add chopped onion and saute it along. also add chopped tomatoes and saute it, till they turn mushy.

    Now Add Turmeric powder, Chilli Powder, salt to taste and 1/2 cup water and give a mix.

    Let the mix boil for 2 minutes and switch off the flame.

    Garnish with some corriander leaves.

    Serve Hot for Idli's.

    Thakkali Gosthu / Tomato Gojju

    During my school days, My Ranks will be on Top during the first quarter of the academic year. and it gradually dips further on the next quarters. Iam sure many of you would have same experience( I cannot be the only one). I think there is more thrive, when things start & then, when the time goes by, the throttle comes down and the thrive disappear! Now the same High Thrive in Morning - Slow Throttle in Afternoon - Disappearance of Thrive in the Evenings Syndrome happens to me on daily basis. Like I Think I should eat Healthy Food in the morning, then in afternoon i manage to cook just to fill tummy and in the evenings / Nights I totally go for Unhealthy stuffs like Fried Gobi Manchurian, Heavy Sugar thrown Sweets. This continues as my daily business. Let me Hope for Best, that i should eat at least 2 healthier Meals a Day.

    Coming to the Oats Breakfast Recipe's, I discovered two Best and Healthy ways to eat Oats without Guilt.
    Oats is a type of Cereal, that helps in reducing the Cholesterol. Oats also get digested slowly, so you don't feel hungry soon on having Oats. The Best Part i like about Oats is, It gives Energy for me to work for the next 2 hours and its So Light  Food to Have. Find its Nutritional Values Here.

    The First Oats Breakfast Recipe is - Oats with Moong Dal and Green Peas

    Oats with Moong Dal and Green Peas

    I liked this much as every bite has Green Peas and the Moong Dal give a different taste along with the Oats.


    Oats Breakfast Recipes

    Prep Time10 mins 
    Cooking Time: 15 mins  
    Serves1
    Recipe CuisineChinese
    Recipe TypeBreakfast

    Ingredients:


    Oats - 4 tbsp's
    Moong Dal - 2 spoons (Soak them in water for about 30 minutes)
    Green Peas - 1/4 Cup
    Green Chilli - 1
    Water - 2 Cups
    Salt - a small pinch (add very little salt, as Oats require less salt)


    Oats Khichdi


    Method:

    Soak the Split Moong Dal in half cup of water for 30 minutes to 1 hour. you can also soak and put in the fridge overnight and wash it with water before using.

    Heat 2 Cup's Water in a skillet and add the Soaked Moong Dal and Green Peas. The Moong Dal may get Cooked within 10-15 minutes. when its almost cooked, add the Green chilli(slitted) and Oats to the Skillet and Cook. Oats gets Cooked in 5 minutes. add salt to taste and Serve Hot.

    Note:

    You can also add chopped Carrot, Beans and some chopped Corriander leaves and make it as Indian Khichdi.

    Second Oats Breakfast Recipe - Oats with Murunga Keerai / Oats with Greens and Dal

    Oats Murunga keerai Pappu

    This tasted much like a Keerai Paruppu Sadham. I even gave this to my Son with Ghee. This is a very healthy one pot meal. If you are wondering, about availability of drumstick leaves, go for Spinach or some fenugreek leaves.


    Ingredients : (serves 1 adult)

    Oats - 4 tsbp's
    Moong Dal - 2 spoons
    Murunga Keerai - a fistfull of leaves
    Green Chilli - 1
    Turmeric Powder - a pinch
    Sambhar Powder - 1/4 tsp
    Water - 2 Cup's
    Oil - 1/4 tsp
    Salt - a little

    Oats with Dal and Greens

    Method:

    First Heat Oil in a Pan.Add the washed and Draines drumstick leaves / Murunga Keerai to the pan and saute it for a minute. it should get cooked.

    Heat 2 Cup's of water in a Skillet and add Moong Dal and cook for about 10 minutes and then add the Green Chilli(slitted) and Oats. Cook the Oats for 5 minutes, add the saute and cooked Keerai / Greens to the skillet and mix well with the Oats and Dal. add salt to taste, a pinch Turmeric Powder and Sambhar Powder / Chilli Powder and cook for 1 or 2 minutes, till the oats get thick and Serve Hot.


    Now Tell Me Which Version You Like and what other versions can be made??