Brahmin style Vatha kuzhambu

This Vatha kuzhambu recipe is the perfect recipe. Making perfect vatha kuzhambu and mor kuzhambu remained  as a dream to me before. Now i have a favorite tutor on youtube, from where i learned to make perfect traditional brahmin style vatha kuzhambu. i have prepared vatha kuzhambu with same ingredients, but now i know, the order in which the ingredients should be put to cook. simple tricks! come on i will teach you, what i learned.

Meal with vatha kuzhambu, sambhar, poriyal

The tricks i learned this time is to roast the sambhar powder, before adding the small onions and garlic. next trick is allowing the kuzhambu to boil well and let the kuzhambu leave oil in the sides of the pan.

Sundakka Vatha kuzhambu

Traditionally vatha kuzhambu is made in kalsatti, it seams the kalsatti made kuzhambu is extra special in taste. Still in many brahmin house-hold, making vathakuzhambu in kalsatti is in practice. When i visited a mess in west mambalam, few people were having curd rice and vatha kuzhambu as the side dish. even i started to eat like that way back home, Its better than eating with pickle! Try for yourself!

This vatha kuzhambu will be bitter, tangy and spicy. a bit of jaggery makes all the taste get balanced. No wonder, this vatha kuzhambu remains as favorite to many people.


Vatha Kuzhambu Recipe

Meal with vatha kuzhambu, sambhar, poriyalPrep Time10 mins 
Cooking Time: 20 mins  
Serves4
Recipe CuisineIndian
Recipe TypeCurry

Ingredients:


Sundakka, Manathakkali vathal - 1/4 cup
Old tamarind- 1/2 a size of lemon
Small onions - 1 cup (15 no.)
Garlic - 1/4 cup (10 no.)
Sambhar powder - 3 tsp's
Jaggery - a tiny bit

For Tempering:

Sesame oil / Nallennai - 1/4 cup
Mustard - 1/2 tsp
Fenugreek / vendhayam - 1/4 tsp
Cumin / Jeeragam - 1/4 tsp
Chana dal / Kadala paruppu - 1 tsp
Dry red chilli - 1
Curry leaves - 1 sprig
Asafoetida powder - 1/4 tsp


vatha kuzhambu ingredients

Method:

1. Soak the tamarind in 1/2 cup of warm water for about 10-15 minutes. Squeeze the tamarind and get the extract in a bowl. repeatedly add water to tamarind and squeeze it twice. this helps in taste.

2. Peel the outer skin of small onions and garlic and keep aside.

3. Heat a tsp of oil in a small pan and roast the sundakka and manathakkali vathal in medium flame for about a minute.

vk prep 1


4. Heat a thick bottomed pan, add 1/4 cup of sesame oil, when the oil is hot, drop in the mustard and let it pop, then add chana dal, jeeragam, fenugreek, dry red chilli, asafoetida powder and curry leaves.

5. Next add in the sambhar powder in slow flame. roast the sambhar powder in slow flame for about 1-2 minutes, till you see change in colour.

vk prep 2

6. Then add the small onions and garlic, roast the onions and garlic in slow flame for about 5 minutes, till the shallots and garlic turn soft and cooked.

vk prep 3

7. Now, when the small onions and garlic are cooked, add in the tamarind water and some curry leaves. add salt to taste and stir well. let the kuzhambu boil in medium flame for about 5 minutes.

vk prep 4

8. The oil should seperate from the curry, only on seeing that, add in the roasted sundakka vathal. Add a small piece of jaggery at the end. again let the kuzhambu boil for about 2-3 minutes.

Switch off the flame and serve hot with rice and appalam. Few people like to have this vatha kuzhambu as a side, for curd rice.

வத்த குழம்பு

Notes:

I have added medium amount of tamarind, you may increase to a small lemon sized one, if you prefer more tangy kuzhambu!.

Vatha kuzhambu stays good for 2-3 days in room temperature.

While you want to prepare food for travel, prepare this kuzhambu the earlier night. prepare it little thick. next day, mix the kuzhambu with hot rice and pack for your travel. it should keep well for 6-8 hours.

Add little salt to the kuzhambu, as the sundakka vathal and manathakkali vathal has salt in it. so it will get  balanced in the kuzhambu.


Whenever my sister anu says, she fed her kid paruppu sadam, i used to think it as rice mixed with dal and ghee. When Sharmi blogged arisi paruppu sadam, i liked it much and was telling about it to my sis. then she told thats what she was feeding her kid often. she told the recipe in a flow. i straight went into the kitchen and made in minutes. Now i have prepared this several times. this is such a easy, pretty fast meal, which you can serve your kids wholeheartedly with lots of ghee.


I prefer to serve this sadam with egg poriyal or appalam. even potato roast will make a nice combination to this rice.


I tried out making video, it was just a trial, please excuse this very very amateur video, as its shot from one hand as the other hand was cooking! sure will get a tripod soon and make better videos in future. 


mute your speaker, as it has my fav song running on background! 

Ingredients:

Rice - 200 gms (1 cup)
Tuvar dal - 40 gms (1/4 cup)
Onion - 1
Tomatoes - 2 medium sized
Green chilly - 1
Garlic - 4 cloves (Crushed)
Turmeric powder - a pinch
Sambhar powder - 1/4 tsp (optional)
Corriander leaves - to garnish
Ghee - 1/2 tsp for serving 

For tempering:

Oil / Ghee - 2 tbsp
Mustard - 1/2 tsp
Split urad dal - 1/2 tsp
Curry leaves - 1 sprig
Asafoetida powder - 1/4 tsp

Method:

Soak the rice and dal together in water for at least 30 minutes. drain the water and set the rice, dal aside. cut the onions and tomatoes finely. crush the garlic and  slit the green chilly vertically. 

Heat a wide bottomed Pressure cooker, add oil or ghee, once it gets hot, start the tempering, add mustard and let it pop. then add split urad dal in medium flame, else it may get browned soon. add crushed garlic, green chilly, asafoetida powder and curry leaves.

Now add the onions and saute till it turns translucent. then add the chopped tomatoes and saute well, till they get soft and mashy. add 1/4 tsp of turmeric powder and 1/4 tsp of sambhar powder. mix all together.

Now add the soaked and drained rice and dal to the cooker, mix well with the onions. add 3 cups of water, and salt to taste. close the pressure cooker with its lid and put on the weight.

Let the pressure cooker whistle for at least 4 times in medium flame. switch off the flame. let the steam escape before opening the lid. Serve hot with a tsp of ghee and appalam or with any side dishes.

arisi paruppu sadam served with brinjal podi varuval and karandi omelette

Notes:

You can omit mustard and urad dal and add cinnamon , bayleaf and cloves as tempering. it will be of a different taste. This is ideal for lunch boxes. so on a busy weekday, you can make this in minutes and pack for your kids.

I know morning walk gives lot of energy, but i am so so lazy to wake up early. i sometimes drop my son at school and walk back home. on the way, i will be tempted to buy fresh greens and vegetables from the roadside vegetable sellers. one day these sorrel leaves/pulicha keerai/gongura/amarnath leaves caught my eye. so with gongura pappu in mind bought a bunch and came back home.


I was very clear to refer Mahanandi for recipe. I love her way of telling the recipe, it will be a detailed recipe told in way, just as our mom or grand mom tell's us. I adapted the recipe little bit and my dal turned out perfect.


minced garlic, green chillies, shallots, toor dal and gongura ready  to get started.


meal with gongura pappu, vendakkai poriyal and curd


                                                 Gongura pappu / Pulicha keerai masiyal


serves - 2
prep and cooking time - less than 30 mins
recipe adapted from The Mahanandi

Ingredients:

  • Gongura leaves - 1 bunch
  • Toor dal - 1/2 cup
  • Shallots / small onions - 15
  • Green chilli - 4
  • Garlic - 4
  • Turmeric powder - a pinch
  • Oil - 1 tsp
  • Asafoetida / perungayam / hing - 1/4 tsp
  • Water - 1 cup
  • Salt to taste
for tempering
  • Ghee - 1 tsp
  • Mustard - 1 tsp
  • Split urad dal - 1 tsp
  • Dry red chilli - 2


Method:

  1. Remove the gongura leaves from the stem and wash the gongura leaves twice or thrice thoroughly. chop or tear the leaves into three pieces. 

  2. Wash the toor dal in a bowl to be kept in pressure cooker and strain away the water. add the chopped gongura leaves to toor dal. then add minced garlic, slitted green chilli, 1 tsp oil and small onions. add water, turmeric powder and hing. mix well. Pressure cook for upto 5 whistles. 

  3. Cool down the pressure cooked dal with gongura for at least 10 minutes. then transfer the pressure cooked contents to the mixie jar and use your pulse button to give one or two pulse shot. add salt to taste and give another mix. once the dal mixes well with gongura, onions and other ingredients, remove the gongura pappu to a serving bowl.

  4. In a small tempering pan, add 1 tsp of ghee and add mustard, split urad dal and dry red chilli. add the tempering to the dal / gongura pappu.

  5. Serve along hot rice along with appalam.

Note:

I added just 2 green chillies and found sourness dominated, so add more chillies 4 or 5 depending on your spice need.


I always stock up this podi, while i was in boarding school, which will help to swallow the hard idli's. even at home, our typical breakfast would be two idli's with pottukadalai paruppu podi. We used to have two different podi's at home, one is this mildly spiced pottukadalai podi for the kid and the other is spicy idli milagaai podi for adults. Pottukadalai podi  is me and my son's favourite podi. we have it with hot idli's  or with hot rice and ghee.


Lunch with carrot beans poriyal, cabbage poriyal, rasam and 2 portions of pottukadalai podi sadham


Pottukadalai Paruppu Podi


Recipe adapted from Shobana's My Cookbook
Preparation time : less than 15 minutes
Yields: approx 150 grams


Required Ingredients:

Kadala paruppu / chana dal - 1/2 cup
Pottukadalai / dalia(roasted chana dal) - 1 cup
Dry red chilli - 6
Black pepper - 6 (or) 1 tsp
Asafoetida / hing - 1/4 tsp
Garlic - 1 clove(optional)
Rock salt - 1/2 tsp

Method:

Dry roast the dals one by one in medium flame. it may take 3-4 minutes to roast the dal.

Next roast the dry red chilli, pepper and garlic.

If you are using rock salt(kal uppu) dry roast it. cool down the roasted ingredients.

Grind all the roasted ingredients along with hing into a fine powder.

Store the podi in an air tight container.

This podi can be mixed with sesame oil and had with idli's and podi can be mixed with hot rice and ghee.


Happy Weekend!!


I just love this veggie from my childhood. Mostly I prepare sepankilangu sambhar. I recently spotted these arbi fry on a buffet at Green Park. I loved it most and now i re-created the dish, just as it was. That’s why I tell you, only a good eater can be a good cook!


Ingredients:

Taro root / Arbi  - 200 gms
Onion – 1 (finely chopped)
Garlic – 2 cloves (finely chopped)
Curry leaves – 1 sprig


Spice Mix:

¼ tsp Turmeric powder
2 tsp chilli powder (I used  aachi kulambu milagaai thool)
1 tsp dhaniya powder
Salt to taste


For Tempering:

Oil – 3 tbsp’s
Mustard – ½ tsp
Asafoetida – ¼ tsp
Cumin – ¼ tsp
White sesame seeds – ¼ tsp


Method:

      Wash the taro root cleanly and boil it in about 1 and ½ cup’s of water, till it is cooked. It may take 10 -12 mins. (or)  Microwave taro root on very high power(900w)  with 1 cup of water for about 13 minutes.
              
        Cool the cooked taro root, and peel its skin off and slice them into half.

          Mix all the Spice mix(turmeric powder, chilli powder, dhaniya powder and salt) together. Coat the spice mix over the taro root and let it rest with the masala’s for about 10 minutes.

         Heat 3 tbsp’s of oil in a deep pan, add mustard, let it pop, then add asafoetida, cumin and curry leaves, finally add sesame seeds and chopped garlic and onion, fry them till they turn golden in colour.

(        Now add the spice coated taro root to the pan and mix well with the onions. Give a good mix and put flame in simmer. Let the taro root simmer for about 10 minutes in the closed pan.  Make sure to check  in between to avoid burning.  Once the taro root is roasted well, switch off the flame.

Serve the Taro root along with rice and sambhar. Iam sure it will be a good meal!!


Vegetable sabzi can be prepared in dry and in gravy form. i am sharing both recipes with you here. Initially i bought sabzi masala, that is available in the market and used it, later, i stopped buying the sabzi masala and added chilly powder, corriander powder, garam masala and kauri methi to my sabzi. it gave the same taste as the sabzi masala available in the market. but i am desperate in knowing what all go into sabzi masala. If you know, please share with me.

Mixed Vegetable Sabzi


Dry Vegetable Sabzi Recipe

Mixed Vegetable SabziPrep Time05 mins 
Cooking Time: 20 mins  
Serves2
Recipe CuisineIndian
Recipe TypeSidedish

Ingredients:

Carrot- 1
Tomato - 1
Green Peas - 1/4 cup
Beans - 10
Beetroot - 1/2
Cauliflower - 4 small florets
Chilli Powder / Sambhar Powder - 1 tsp
Turmeric Powder - a pinch
Garam Masala - 1/4 tsp
Kasuri Methi /Dry Methi Leaves - 2 tsp's
Oil - 1 tsp
Cumin - 1/4 tsp


Method:

Chop the vegetables into small pieces.

Heat oil in a pan, add cumin and let it get roasted.

Add finely chopped tomatoes to the pan, Let the tomatoes shrink and mash them on the pan with the slotted spoon. add turmeric powder, chilli powder, garam masala and salt to taste. mix the masala well with the tomatoes.

Add the chopped vegetables to the pan, mix the veggies well with the tomatoes and the masala. add kasuri methi and give a mix.

Sprinkle 2 tsp's of water over the pan and close the pan with its lid. let the vegetable's simmer in slow flame for about 5 -10 minutes till the vegetables get half-way cooked. as i do not like over cooking the vegetables, i removed the sabzi, when the vegetables are half-cooked.

Vegetable Sabzi for Chapathi

Serve the sabzi with Chapathi's.

                                                         Vegetable sabzi  (Gravy)


North Indian Vegetable Sabzi

Ingredients:

Mixed Vegetables - 2 cup's chopped(carrot,beans, green peas, potato and cauliflower)
Onion - 1
Tomato - 1
Ginger garlic paste- 1 tsp
Oil - 1 tbsp
Cumin - 1/2 tsp
Chilly powder - 1 or 2 tsp's
Corriander powder - 2 tsp's
Garam masala - 1/4 tsp
Kasuri methi - 1/2 tsp
Chopped corriander leaves - 2 tsp's

Method:

In a wide bottomed pressure cooker, add oil and heat it. add cumin and let it roast.

Add finely chopped onions, bit of salt and saute till they turn translucent. then add ginger garlic paste and saute it till the raw smell leaves.

Add tomatoes and saute till they turn soft. now add salt, chilly powder, corriander powder, garam masala
and mix well with the onion and tomatoes.

Then add in the chopped vegetables and mix well. add a cup of water and kasuri methi and give a mix. check for salt and add as per your taste. then add the chopped corriander leaves and close the pressure cooker with its lid. let the sabzi pressure cook for up to 2 whistles exactly. switch off the flame and let the steam escape. Now transfer the sabzi to a serving bowl.

Serve with Chapathi or Roti. I enjoyed it with phulkha and peas pulao.


Mixed vegetable sabzi


Today Morning i saw this curry recipe in my favourite TV show- AVM Managayar Ulagam. I had all the ingredients ready in hand, so went ahead without any hesitaion. The Real name of this curry is Kathrikkaai Kuttai Kuzhambu, it means Thick Eggplant curry. It seams, this dish is from Thanjavur Cuisine, which is my favourite. Trichy and Tanjore are the best places offering vegetarian food in TamilNadu. Karaikudi is the best for Non-Vegetarians. Coming to the Curry, it tasted so different and was great with Hot Rice.

Kathrikkaai Kadalai Kuzhambu


If you are having purple brinjal's in hand, and overnight soaked chickpea, then this is very easy dish to make.


Kathrikkaai Kutta Kuzhambu

Ingredients:

Purple Brinjal's - 10
Brown Chickpea - 1/4 cup (soaked for12 hrs)
Gingelly Oil - 1/4 cup
Mustard - 1 tsp
Split Urad Dal - 1 tsp
Curry Leaves - 10
Sambhar Powder - 2 tbsp
Turmeric - a pinch
Tamaraind - a small lemon size or 1 tbsp Tamarind paste
Jaggery - 1/2 tsp
Asafoetida Powder - 1 tsp

Ghee - 1 tbsp
Grated Coconut - 3 tbsp's

Method:

First Wash the Brinjal's and cut them into small pieces and put them into a cup of water to avoid the colour change.

In a Heavy Bottomed Kadaai, Heat the Oil, add the asafoetida powder, mustard and let the mustard pop. Add the split urad dal and curry leaves and wait till it get roasted.

Now add the Sambhar Powder and fry the powder in the oil for a minute or till a slight colour change occurs. Now add the brinjal pieces and fry them for a minute, till they start shrinking and change its colour.

Now add soaked brown chickpea to the brinjal and mix well. add turmeric powder and salt to the brinjal, chickpea and mix well.

Add the tamarind water and mix well. close the kadaai / Pan with its lid and let it rest on the stove for about 10 minutes in a medium flame. Add Jaggery in between and stir well.

Let the Curry gets thick and then switch of the flame.

Heat a tbsp of ghee in a pan and add the grated coconut to the ghee and fry it till it turns golden colour (refer the picture). add the roasted coconut to the curry and serve hot with rice.


Eggplant Chickpea Curry


This curry got a well balanced tangyness, spice and tasted little bit sweet bcoz of jaggery.
The chickpea was cooked in just 10 minutes and tasted well in the curry. The Highlight was the Purple Brinjal's which took the masala's into it and tasted excellent, iam drooling on typing this.

Dont Miss to try if you are a Eggplant / Kathrikkaai Lover.


Yes I prepared Mor Kuzhambu with Zucchini. Today i could not find any vegetables for making a curry or sambhar in my Fridge. I had a Zucchini, which i bought to try soup with it. Finally Morkuzhambu took over the Soup and it did'nt fail to impress us. I got to have a pie of inspiration from Priya, I really wonder, how she plays on ideas with Zucchini. Zucchini Vadai, and Chocolate Bread with Zucchini are must to look for in her blog. Thanks Priya for the Award.


Zucchini Mor Kuzhambu

How to Prepare?

Zucchini - 1 [cut into cubes and saute them in a pan with a tbsp of oil for about 3 minutes, till they start to get roasted, add little water, till the Zucchini are covered and let it get cooked for about 2 minutes].

Soak the Dal in warm water for one hour.
Toor Dal - 1 tbsp
Chana Dal - 1 tbsp

Grind the above Soaked with the following Ingredients.
Dhania - 1 tbsp
Ginger - of 1/2 inch size
Dry Red Chilli - 5
Cumin/Jeera - 1 tbsp
Grated Coconut - 2 tbsp
Yogurt / Thick Sour Curd - 1 cup
Turmeric Powder - a pinch
Salt - as per taste and
1/4 cup of water.

Add the Grinded Paste to the Zucchini in the pan and stir well. let it get heated for a minute. after a minute Transfer it to the serving bowl.

Heat a tbsp of oil in a small pan for tempering, add 2 tsp of Mustard + 1 tsp of Cumin + pinch of hing + 1 tsp of urad dal + 2 dry red chilli and few curry leaves. roast for about half minute and add to the Zucchini in the serving bowl.

Enjoyed the Morkuzhambu with Bitter Gourd Chips. it was a great meal!

My son started to take lunch to his school from last week. first i was very tensed on how he will adjust to eat all by himself. then i was worrying on what to pack for him. In this chennai climate, my curd rice could not withstand, even if i add lots of milk and less curd, climate spoils it! so our most comfort food curd rice cannot be packed for lunch! Past week was like a research period, as i am finding out, what he eats, what he brings back home, what he doesn't even touch and stuff's. till now, vegetable pulao is one safe food to pack. have to find out more. today i tried this fried rice, both my hubby and my son liked it very much and the boxes came empty. update: Now my son asks me to pack this fried rice quite often.

veg fried rice


Last year i completely enjoyed my life along with this sweet blog, which gave so many nice friends. This year, i have few resolutions, of making my cooking with less oil, with less sugar. when i said this to my hubby, he said, don't make me feel old so soon. Then i just left the Sunday's as exceptions. I don't believe in implementing the resolutions right from Jan 1st. I planned them well before and am practicing for the past one month. This Veg Fried Rice, really impressed me, as it can be made in minutes and also i feel the nutrients in these veggies are not omitted, just by sauteing them till semi-cooked. I am sending this off to Eat Healthy-During Pregnancy Event.

vegetable fried rice


                                                            Vegetable Fried Rice

Ingredients:

Basmati rice-150 gms
Sesame oil - 2  tsp's
Carrot - 1
Green Capsicum - 1/2
Cabbage - 1/2
Spring onions - 4
Small onion - 4 / white onion - 1
Garlic - 3 pods
Pepper powder - 1/2 tsp
Soy sauce - 3 drops
Vinegar - 2 drops

Method:

Measure Basmati rice in a cup and set aside. for 1 cup of basmati rice, you need 1 and 1/2 cup's of water.
so measure the rice and water accordingly and set aside.

Wash and soak the basmati rice for 10 minutes. then drain the water completely. In a Pressure cooker, add 2 cups of water and place a bowl of basmati rice along with measured water. add 2 drops of vinegar or lemon juice and little bit of salt for rice. close the cooker with its lid and put on the weight. pressure cook for up to 2 whistles exactly. once the steam escapes, open the lid and remove the rice to a plate and wide spread the rice. add 1/2 tsp of sesame oil and mix the rice with a fork gently.

Cut the vegetables into very thin strips. use the spring onions, onions also. it gives a good taste to the fried rice. if not use small onions or white onions.

In a pan, add 2 tsp of sesame oil, add finely chopped garlic, then add onions and saute till they turn translucent. then add carrot and saute it. then add the capsicum and the cabbage. saute them, till the vegetables are half cooked. add very little salt and 1/2 tsp of pepper powder to the vegetables for taste. finally add 3 drops of soy sauce and mix with the vegetables. switch off the flame.

Add the cooled rice to the pan and mix well with the vegetables. finely chop the spring onions(green part) and add it to the pan and mix well. do all the mixing, when the vegetables remain hot.

Transfer the fried rice to the serving bowl.

Notes:

It is almost a rule for me to add spring onions to the fried rice. also make it a point to finely slice the vegetables.

You may add a bit of ajina motto at the end. but it is best avoided.


Tip:

We add mustard in our cooking, to remove if any poison present in the food. Before adding the mustard, check whether oil is heated and after adding the mustard let them splutter. this just takes less than a minute.

Over the years mustard has been prescribed for scorpion stings and snake bites, epilepsy, toothache, bruises, stiff neck, rheumatism, colic and respiratory troubles.

I do not want to blog simple recipe's.. This recipe may be simple, but i felt it is worth of sharing. During these rainy day' s, i want my lunch to be hot, light and satisfying. This Rasam fits all these criteria. Serving some pappad's or some potato chips along with, will be a real filled meal. This is best for digestion and best charger-when you have cold, as the recipe calls for pepper corns.

Ingredients:
  • Pepper-8 corns
  • Cumin-1 tbsp
  • Turmeric Powder-a Pinch
  • Garlic- 5 Big Cloves
  • Corriander Leaves-5 to 6 stems
  • Water- 1 cup
  • Tomato-1
  • Asafoetida Powder-a pinch
  • Red Chilli-1(If you like it to be little more spicy)
  • Oil- 1/2 tsp


Spices for Rasam


Method:

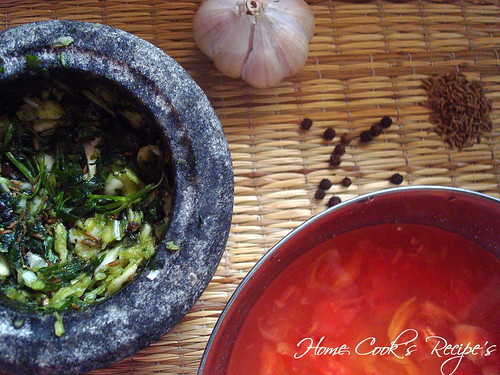
yyu Ground the spices-Garlic(5 cloves), cumin(1 tbsp), Corriander leaves(leaves of 6 stems) and Pepper(8-10). You can use the Pulse button on your mixer grinder to ground the spices. Dont Forget to smell at this stage..a refreshing aroma it is..
yyu In a cup of water, sqeeze the tomato well and set them aside.

yyu In a pan, heat the oil, when heated, add some cumin seeds and asafoetida powder. if you want some extra spice, add red chilli's. Now add the ground mixture and saute it for half a minute.

yyu Add the tomato water and a pinch of turmeric powder and salt required as per your taste. Dont Let it boil. just heating is enough. it just takes another half a minute.


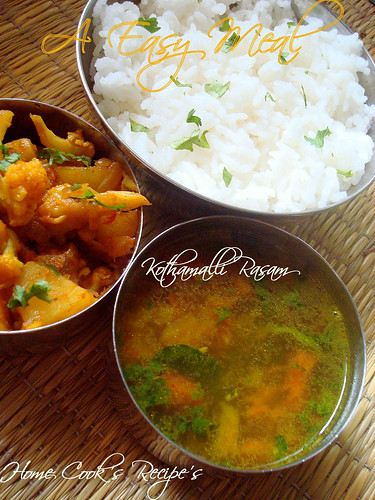
Kothamalli Rasam,Aloo Gobi Fry

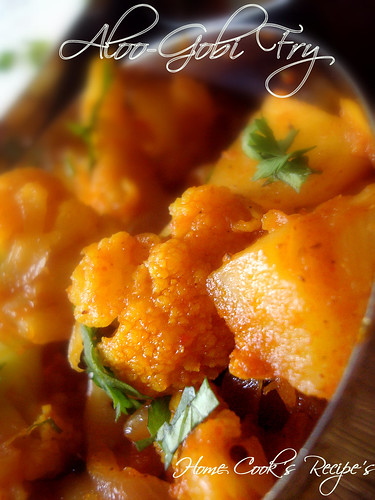
A Real Refresher for the winter. I served it with aloo gobi fry, which was so divine combination.

Aloo Gobi Fry

Serve it Hot, Only when it is Hot, it is Divine...
Picture 468 copy

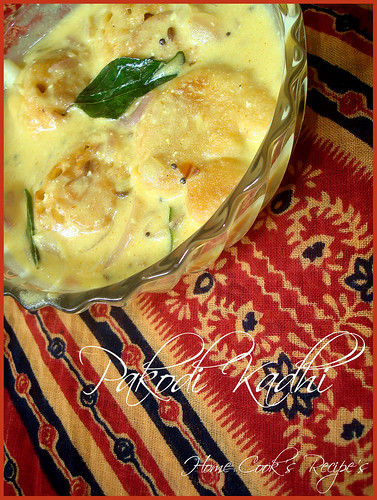
Some four months back, i had a chance to get a Rajasthani Friend(this is how i refer her). Since her hubby got transferred to Delhi, She is in Delhi now. It was so unfortunate to miss a nice friend around. When she was about to leave, we shared some tiffin boxes, This Kadhi is one dish, which she prepared for me and i tried this for lunch today. It did'nt taste like her's, but was somewhere close to her's. here it is for all your eyes...

pakodi kadhi
Ingredients:

  • Bengal Gram Flour: 1/2 cup
  • Curd: 1 Cup
  • Oil-10tbsp(8 tbsp to fry the Pakodi's, 2 for Seasoning)
  • Chilli Powder- 2 tsp
  • Turmeric Powder- 1 pinch
  • Baking Soda/Sodium-Bi-Carbonate-a light pinch
  • Garlic- 2 cloves(finely chopped)
  • Onion-1
  • Mustard-1/4 tsp
  • Cumin-1/4 tsp
  • Asafoetida-a pinch
  • Curry Leaves-8

Method:

yyu Take the Gram flour(Have 2tsp aside-for making kadhi), add few cumin, asafoetida, chilli powder, little salt, baking soda and mix well. add little water and make it as your Bajji/Fritter's dough. Heat oil and fry this Pakodi's till they are cooked. need not fry till they reach golden color. Now keep your pakodi's aside.

yyu Have a cup of curd, and add little turmeric powder, chilli powder, salt, asafoetida and mix well. set this aside.

yyu Now in a pan, add 2 tsp oil and heat it, when its heated, add mustard and let it make some sound, add the cumin and curry leaves. add onion's, finely chopped garlic and fry them. now add the curd mixture and the pakodi's. let them on stove for 2 more minutes and switch off the flame.

You can prepare this in less than 15 minute's and this is perfect with rice and chapathi's.
Scroll Down to Catch up Other Foodie's..

When i was in hostel during my childhood, we will wait for Friday's Lunch as we will be served Mochai Kuzhambhu/curry. I used to put the Mochai's alone in a small box and take it back to school for my classmates. we loved eating mochai's a lot those days. I prepared along with Raw Banana, which certainly made a good pair to these mochai's.


Picture 513 copy


Now Iam happily sharing with you all my Spicy Tangy Mochai Curry. Actually the recipe was inspired from Fish Curry. So those who are craving for non-veg gravy, but still a veg, i can assure you this will please you definitely.

Ingredients:

  • Mochai-1 cup(soaked for 12 hours and pressure cooked up to 7 whistles)
  • Raw Banana- 1/2(cutted in round shape)
  • Onion-1(finely chopped)
  • Tomato-1(finely Chopped)

For Grinding:

yyu Ginger-1/2 inch size

yyu Garlic- 4 cloves

yyu Green Chili- 1

yyu Dhania/Corriander Seeds- 1tsp

yyu Grated Coconut- 3 tbsp

yyu Cumin- 1 tsp

Grind the above in to a thick coarse paste and keep it aside. the aroma it arises is definitely not forgettable.

Preparing Tamarind Water:

In Half a cup of warm water soak a small lemon sized tamarind for about 10 minutes. then add the following list of powder's to it.

yyu Turmeric Powder- 1/4 tsp

yyu Chilly Powder- 3 tsp's

yyu Pepper Powder- 2 tsp's

Mix all the above powders to the tamarind water and keep it aside.

For Tadka:

yyu Mustard-1 tsp

yyu Fenugreek seeds- 1/4 tsp

yyu Curry Leaves- 8

yyu Dry Red Chilli-3

yyu Oil -1/4 cup( you can reduce, if you are not using Raw Banana)

Method:

arrow_42 In a kadai, add oil and heat it, now add mustard and Wait till it crackles. now add fenugreek and let it turn brown in color, now add red chilli's, curry leaves and roast them.

arrow_42 Now add finely chopped onions and fry them till they get reduced in size and come along together. now add finely chopped tomatoes and fry well.

arrow_42 Now add turmeric powder a pinch and salt a pinch and fry them well.

arrow_42 Add the Raw Banana to it and mix well. let the raw banana cooked in slow flame for about 7-10 minutes.

arrow_42 Then add the Grounded Paste and Mochai and allow it to boil.

arrow_42 Now add the tamarind water and allow it to boil.

arrow_42 Add salt and water accordingly.


Picture 509 copy

Enjoy the curry along with Rice. It goes well with Curd Rice. Now this Curry is on its way to my-legume-love-affair hosted by Sra. the legume affair event started by Dear Susan. A real last minute entry.