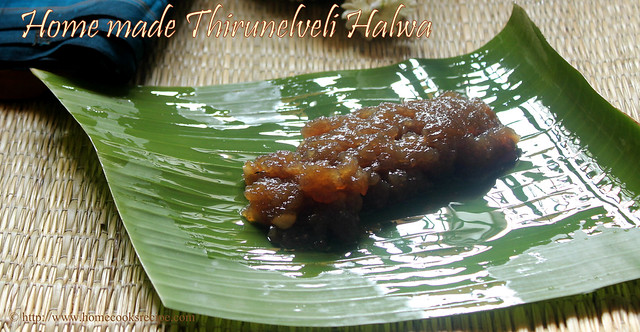
Thirunelveli Halwa

Making our traditional sweets brings more happiness. Tirunelveli halwa is my hubby's favorite. He always buys a pack of halwa whenever he visits tirunelveli. I wanted to try this halwa for this diwali, first i was little hesitant to try as it takes lots of ghee to make. Watching masterchef and all the cookery shows, i gathered my confidence and tried it.
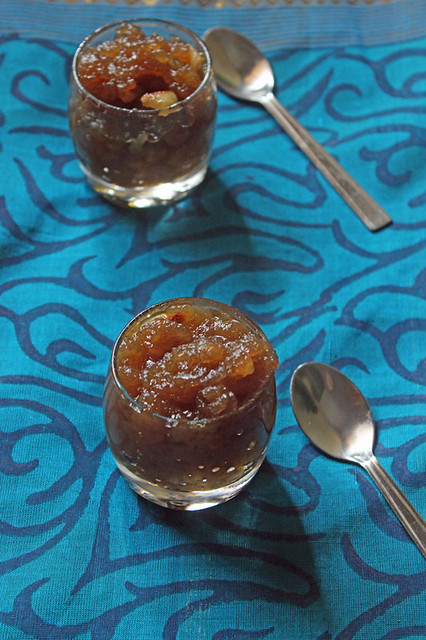
Wheat Halwa

Tirunelveli halwa came out so well and everyone who ate loved it and asked me for the second servings. Feeling Great on trying this halwa! Though everyone liked this halwa more than my jangri, I completely loved my jangri!

When Jayashree posted halwa recipe back in 2008, i kept a note of the recipe as it was so easy that we need not stir and just use our pressure cooker and microwave oven. I started making as per her recipe and when i added the wheat milk to the sugar and water in the cooker, it got thickened instantly, i feared about pressure cooking the mix and went ahead with the traditional painful stirring on stove top! But will try out the microwave version once for sure, as i liked the halwa taste.
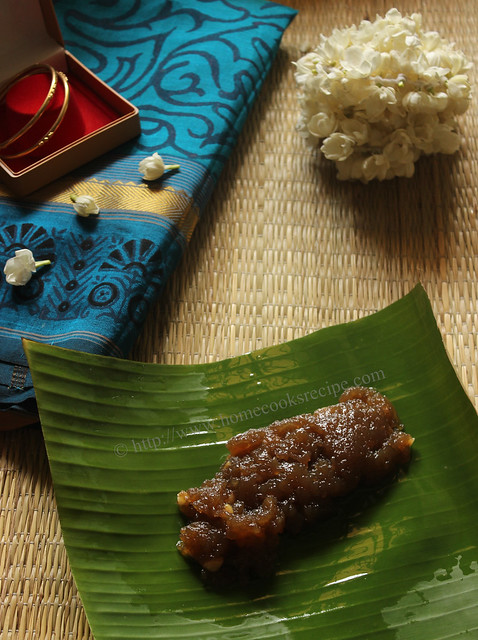
Tirunelveli Halwa

This Halwa recipe is not tricky, its very easy to make and beautifully turns out into delicious halwa with just one mandatory condition of stirring it for about 1 hour! Yes it almost takes 1 hour to stir,stir, stir, ghee, ghee, ghee, stir, stir, stir. thats it. The next day, halwa was beautifully set and i was happy to cut them into slices. It was silky and firm, a perfect halwa i would say!
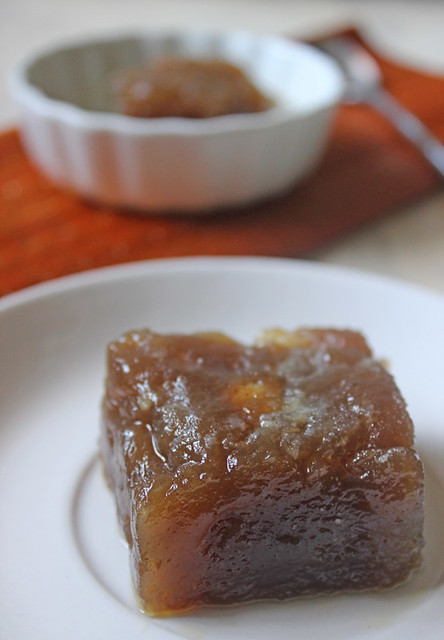
Thirunelveli Halwa

When i started clicking pictures, rain started and the weather went gloomy. i could not click pictures as i wanted. so here is my statement - Do not judge this halwa with its appearance, it was so Yummy!! I just took a picture of this halwa with jasmine, as the idea struck, so here it is...
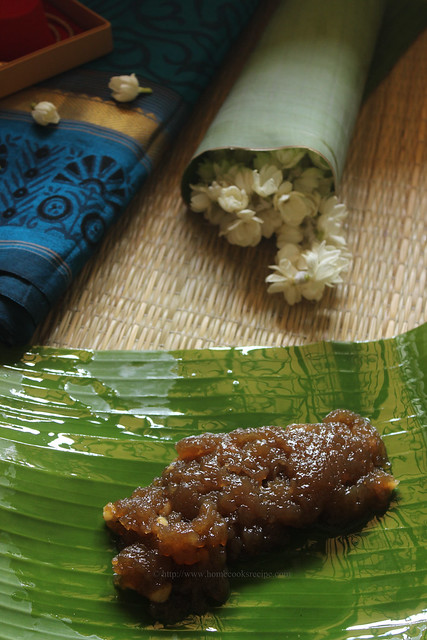
halwa

Ingredients:

Cracked Wheat / Samba Godhumai Rava - 1 cup / 250 gms.
Brown Sugar - 3 cups
Ghee - 3/4 cup / 200 ml.
Water - 4 cup
Cashews - 10

[1 cup cracked wheat yielded 1 cup wheat milk.
For 1 cup wheat milk - 3 cups of brown sugar and 4 cups of water is added. ]

Method:
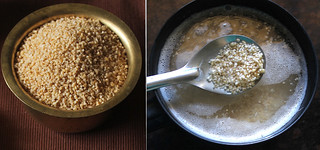
Starred Photos64


Soak the Cracked Wheat in water for overnight or 10 hours.
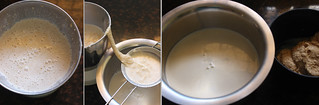
Starred Photos65


Next day grind the soaked cracked wheat along with water in your mixie jar. Now filter the grinded mix to extract the first pressed milk. then add another cup of water and grind to get the second pressed milk. its just like how we do for coconut milk.
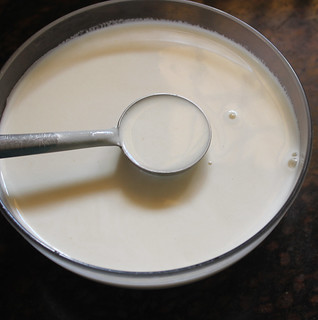
IMG_6779

Once the wheat milk is extracted, mix the first pressed and second pressed and set aside. do not disturb it for 2 hours.
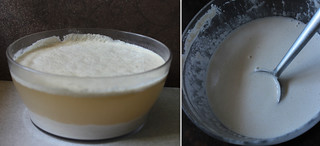
Starred Photos66

After 2 hours, the milk would have developed scum and the water would have seperated and will be above the milk layer. discard the water carefully and measure the milk alone. For me it exactly measured 1 cup / 250 ml. Wheat milk was like dosa batter.
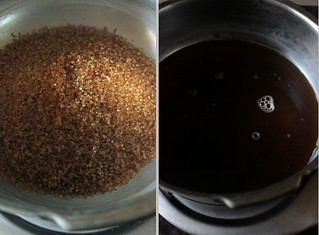
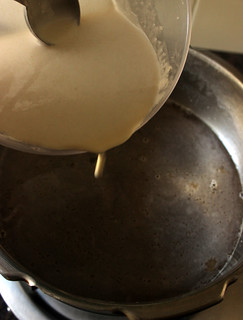
Starred Photos67

In a Pressure cooker pan, add 3 cups of brown sugar and cups of water. just dilute the sugar and switch on the flame.

IMG_6803

Make sure the flame is low and start adding the wheat milk on one hand and keep stirring with the other hand, so that no lumps are formed. actually i left to form lumps, as i was clicking pics. then i managed to filter the whole mix and started off again.

Starred Photos70

Soon after adding the wheat milk, it got thicken, and the stirring process started. You need to stir for every 30 seconds to avoid the halwa sticking to the bottom.
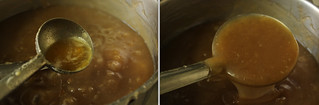
Starred Photos72


In the mean time, chop the cashews into small pieces, fry in ghee and add it to the halwa.
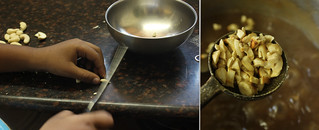
Starred Photos71

Keep on stirring and add ghee 1 tbsp at a time. almost 45 mins later, halwa drank all the ghee and got ready, as it started to ooze out the ghee. it also stops sticking to the bottom.
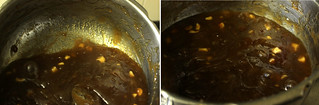
Starred Photos68

check this video to get an idea, on how the halwa will look at the end.


Once the halwa is ready, serve it warm to your family and then you can grease a tray with the ghee that ooze out from halwa and transfer the halwa to the greased tray. i left the tray overnight and i was able to cut the halwa into slices.
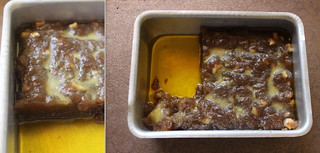
Starred Photos69


Re-heat the halwa, every time you serve, as the ghee tend to solidify and change the halwa texture and taste,
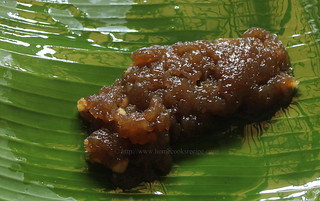
Thirunelveli halwa


Notes:

You can use normal sugar, i preferred brown sugar to get the exact tirunelveli halwa color.

Be generous with the amount of ghee you add, finally it oozes out the ghee, so if you prefer, you can remove the ghee and consume.

This halwa keeps well for 2 days at room temperature. you can store this halwa in fridge and it stays good for 2 weeks.

Always Re-heat or microwave the halwa for 30 - 45 seconds before serving.

Use only Samba Wheat Rava to make this halwa.


jangri5

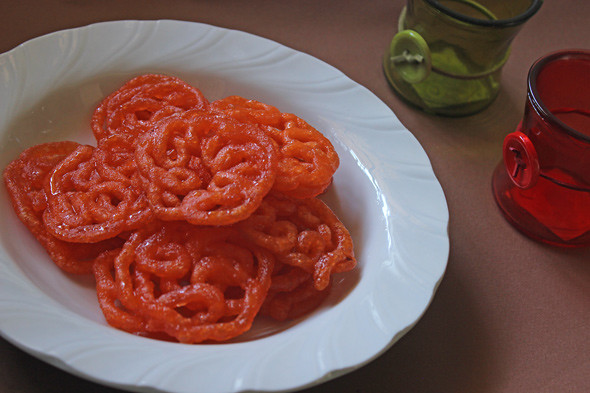
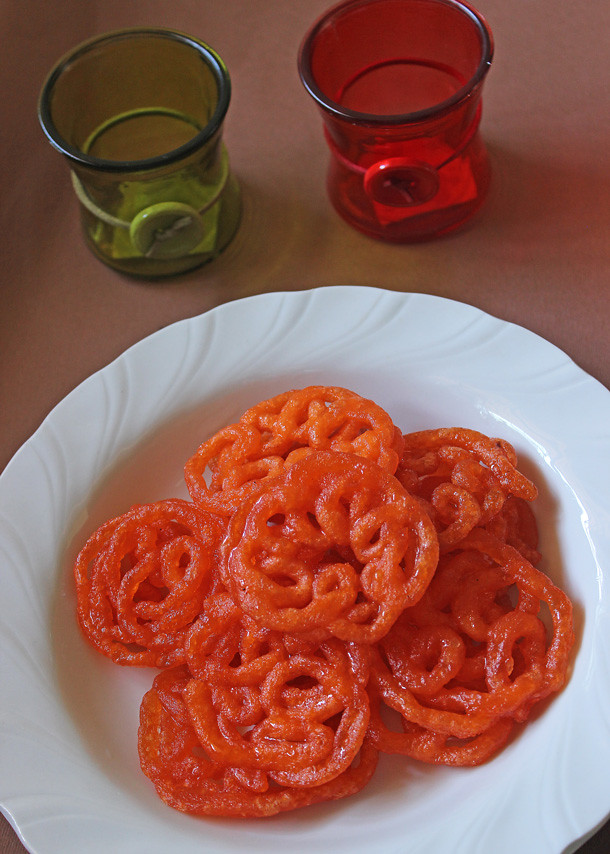
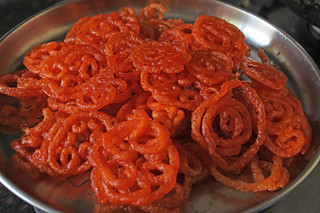
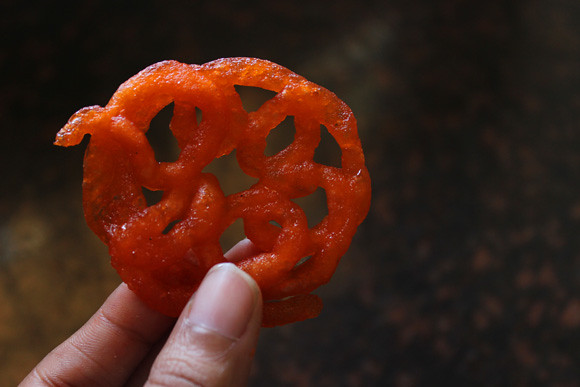
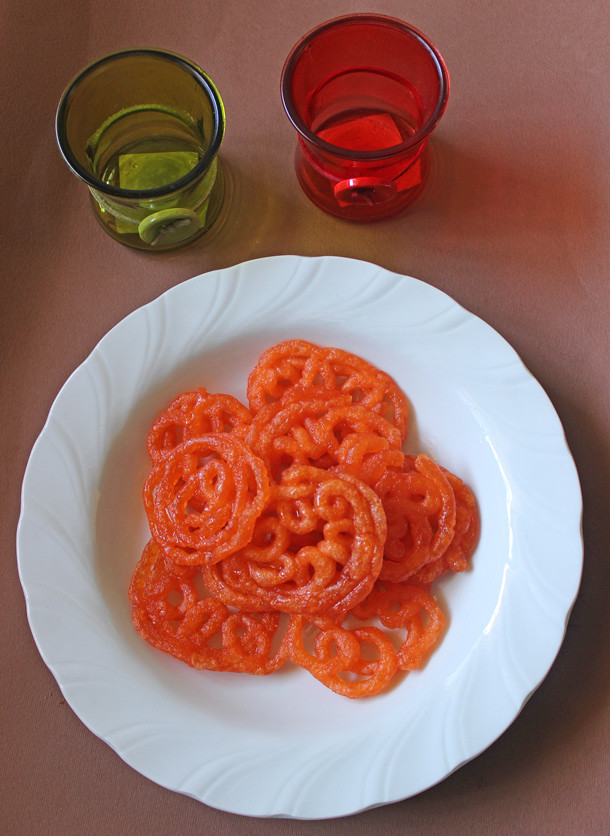
Yes! I made it! I jumped out of joy when i saw my jangri holding its shape, i was very thrilled when i tasted crispy and hot jangris. Jangri is my favorite sweet. I like to eat it warm. My Grand father would buy me warm jangri from sweet stalls, and i would devour it! Bliss!! Every diwali i used to experiment making jangri. after failing for 4 years, this time i cracked the jangri code. everyone appreciated it. My son is my best critic. he said its Nice, but it should be more sweet like the ones in sweet shops. Yes he was right. Sweet shops jangri are more sweeter than mine.


jangri2

Sharmi kept on pushing me to try some sweet for this diwali. Yesterday i tried/experimented making jangri and it was a flop show. Today without giving up i made and here it is. of course there is a proper method in making jangri. i call it as tricks. I will share what all mistakes i made earlier and what worked. so this recipe becomes a fool proof one.

jangri


From the day one i first saw Raks Jangri, i wanted to try. Every diwali i open up her blog and go to her jangri post and drool at her jangris:) Thank You Raks for the inspiration!!

Yields - 25 jangris
Soaking time - 1 hour. you can make whole batch of jangris in 1 hour.

Ingredients:

Whole Urad dal - 1/2 cup
Sugar - 3/4 cup
Sunflower oil - 2 cups
Orange red food color - 2 pinch (or) 1/4 tsp

Method:

Wash the urad dal in water for about 5 times, till you see clear water. Soak the urad dal in water for about 1 hour.


Drain the urad dal and grind it in your mixie jar with little water. grind it smoothly. make sure you grind into a fine paste. it would take 2 or 3 minutes to grind finely. you should see the batter bubbling and going off.


Once the urad dal batter is done, transfer it to a bowl. add orange red food color to it and mix well. If you have a zip lock cover, spoon in the batter into the cover and make a small hole like we make for our mehendi cones. (remember the hole should be small, the batter expands and you get a little thick jangris in oil) i had my cup cake frosting kit and i used it.


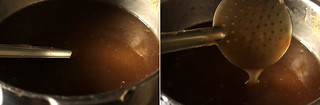
To make sugar syrup, measure 3/4 cup of sugar and add 1 cup of water. dilute the sugar and bring it to boil. Do not go for string consistency here. its enough if you get to the stage as we get for gulab jamun. we call it as sticky stage or pisukku padham in tamil.


Heat a wide bottomed pan. add 2 cups of oil to it and heat it. Oil should be off medium hot. switch off the flame and draw jangri patterns in oil with your hand some 7 - 10 cms above the oil. after drawing the jangri patterns. switch on the flame to low heat. using a chopstick or paniyaram kuchi, slowly turn the jangri's. it will get cooked in less than a minute. slowly pick the jangri and soak it in sugar syrup for 2 minutes and then transfer it to a clean plate. (do not use kitchen tissue).

jangri3


Eat and Serve the Jangri Hot/Warm to your loved ones.

Tricks:

1. Urad dal should be washed well before it is soaked. i washed it for 5 times.

2. Maintain low heat or switch off the flame while making jangri patterns and then you can switch on the flame immediately.

3. Make sure your urad dal batter is not so thick or watery. refer stepwise pics to get the idea of the batter. make sure you grind the batter smooth. you can use grinder, if you are used to grind batter for vada in it.

4. You can use a normal cover or ziplock cover to fill the batter.

5. Do not make sugar syrup with single string consistency. sugar syrup should be little thicker than we get for our gulab jamun.

6. Jangri get cooked very fast. do not fry for longer time.

7. You need not use Raw rice or Rice flour or corn flour along with urad dal. just urad dal gives great jangris.

jangri1


What all mistakes i made earlier-

1. First i grinded the urad dal batter into a very thick one. no it should be of correct consistency as we do for our vada.

2. I drawed jangri patterns in hot oil. then in medium flame, then in slow flame. all got expanded and lost its shape in oil. i switched off the flame and drawed jangri patterns. then i switched on the flame to low flame. finally it worked.

3. Before i used to make single string consistency and it did not work for me. as i said it should be off pisukku padham or sticky sugar syrup consistency.

4. Before i have added rice flour, corn flour, soaked raw rice to the batter to get crispy jangris. without all these jangri came out well today. i consider washing the urad dal well, makes the jangry more crisper. here i reveal my secret for soft idly- i just wash my urad dal once to get soft idly.


Motichoor laddu

This is one of my favorite sweets these days. My favorite orange color attracts me to these ladoo i guess. i was quite determined to make this motichoor ladoo for this diwali. it was decided last diwali itself. i was searching for boondhi laddle with small holes for the past one year. i could not find it. compromising it, i made these motichoor ladoo with my normal boondhi laddle. check my boondhi laddu recipe, to know about the boondhi laddle and the other laddle's needed to make these motichoor ladoo.

Motichoor laddu with mawa

As i normally believe, one who eats enjoying the taste of the dish can be a good cook. I have enjoyed eating these motochoor ladoo in different sweet shops. i found a slight difference between the ladoo in sri mithai sweet shop and other shops. later i identified mawa/koya is added to the ladoo, which gives a rich deliciousness to the ladoo.

Motichoor laddu with khoya

First time, i became over enthusiastic and added more khoya to the boondis. then i prepared again correcting the mistake that i made first time. so it is advisable to add 1/4 cup of khoya for 1 cup of besan flour.

moti laddu

If you are beginner in making ladoo, first try with half cup of besan flour. for half cup of besan flour add 1/4 cup of water little by little to get thick batter. then you can 1 or 2 tsp of water to bring it to dosa batter consistency. for the sugar syrup, add half cup sugar and 1/4 cup water. sugar syrup should be of one thread consistency.


                                                           Motichoor Ladoo recipe

Yields - 12 or 14 ladoos
Preparation time - 10 mins
Cooking time - 30 mins
Recipe inspiration - Spices and Aroma
Recipe Referred - Jeyashri's Kitchen 

Ingredients:

Besan flour - 1 cup (250 gms)
Water - 3/4 cup
Orange red food color - a small pinch
Baking soda - less than 1/4 tsp
Sunflower oil - 1 cup for frying
Melon seeds - 1 tsp
Saffron - few to garnish
Mawa / khoya / unsweetened khoa - 1/4 cup

For Sugar syrup:

Sugar - 1 cup (250 gms) use good quality of sugar like parry's sugar.
Water - 1/2 cup (125ml)
Orange red food color - a dot sized pinch

Method:

                         
click on the pics to see it in larger size

Sieve the besan flour well with baking soda and with orange red color. Mix the besan flour with 3/4 cup of water. sieve it again to avoid any lumps. batter should be little thicker like dosa batter.


Heat 1 cup of oil in a pan. drop a small drop of besan batter in oil to check whether it rises in the oil soon after it is dropped. Bring the boondhi laddle just 3 or 4 inches above the oil. take besan batter in a laddle and spread over the boondhi laddle. lightly tap the boondhi laddle so that the boondhi's easily fall off into the oil.


It just takes less than a minute for the boondhi's to get fried for ladoo. remember that the boondis should be taken off from oil, before it turns crispier. soon after the oil stop sizzling, remove the boondhi to a strainer or to a kitchen tissue paper to drain off the exccess oil. for the next batch, wash the boondi latter in water and wipe it with a clean kitchen towel. likewise make boondis and wash the laddle after every batch to avoid the tails in boondi.


Now to prepare the sugar syrup, by heating a pan with 1 cup of sugar and 1/2 cup of water. stir well to dissolve the sugar. filter the dissolved sugar syrup and let it boil again to attain one thread consistency in sugar syrup. add a small dot sized orange food color to the syrup. switch off the flame.


Mix the prepared boondi with sugar syrup. mix well so that all the boondis are coated in sugar syrup. 


Separate 3 tbsp of boondi aside and grind the remaining in your mixer with just 1 tsp of boiling water. just give a pulse. if you grind too much, it may not be easy to shape the ladoos. 


Now mix the grounded boondis with whole boondis. Dry roast the melon seeds and add it to the boondi. grate 1/4 cup of khoya and add to the boondi. 


Mix the boondi and khoya together. mix well and start shaping the ladoos. if preferred, smear little ghee on your palms and shape the ladoos and place it on butter paper or on a small cup cake liner for the first few hours.

Garnish each ladoo with melon seeds and saffron. 

Serve these Orange Beauties to your family and loved ones. I am sure they will enjoy as our family did.

Motichur laddu


Notes:

Since khoya is added to these ladoo, it should be refrigerated. it keeps well under refrigeration for up to a week.

Adding khoya is optional. but the taste it leaves on your tongue after having one ladoo is just out of the world.

Shaping ladoo is not difficult, if the sugar syrup is prepared in the ratio of 1 cup of suagr for 1/2 cup of water. remember the ratio for 1 cup besan flour is 1 cup of sugar.

Traditionally milk is added to the besan flour for preparing boondis. 


Do you like this recipe and picture? please leave me a line to make me smile, as it was a tough task to try these ladoos twice and click step wise pictures with one hand cooking and one hand clicking pictures to share with you all..

Dry fruits laddu is also known as Antina unde in karnataka. It is also prepared in maharashtra for krishna jayanthi. When we were in bangalore, we used to buy these laddu's quite often. Me and hubby will be guessing the ingredients in the laddu one be one. We both love this laddu a lot. As it is not very much available in Chennai, i thought of making these healthy laddus for this diwali.

dry fruits laddu


This Laddu is given to lactating mothers as it helps to increase lactation . it is said to strengthen the backbones, as it has edible gum / gondh as one of the ingredient. 

Dink laadu


Dry Fruits Laddu

dry fruits ladduPrep Time10 mins 
Cooking Time: 10 mins  
Serves8
Recipe CuisineIndian
Recipe TypeSweets

Ingredients:


Dates - 10 (chopped into small pieces)
Dry Grapes / Raisins - 20 (chopped into small pieces)
Cashews - 20 (chopped into small pieces)
Badam - 20 (chopped into small pieces)
Grated dry coconut / kopparai thengaai - 1/2
Nutmeg powder - a pinch
Cardamom powder - a pinch
Dry Ginger powder - 1/4 tsp
Kasa-kasa - 2 tsp's
Ghee - 2 tsp's
Edible gum / Bombay gondh - 1 tbsp (optional)

For Jaggery syrup:

Jaggery - 1/3 cup
Water - 1/4 cup


dry fruits and nuts for laddu

Method:

Heat a pan. add 1 tsp of ghee. fry the gondh till it puffs up as raisins. drain and transfer to a bowl. once it gets cooled, powder it in mixer jar and transfer it to a mixing bowl.

bombay gondh


To the same pan, add the grated dry coconut and roast it for a minute and remove to a mixing bowl. then roast badam, cashew and finally dates and raisins. transfer the roasted to the mixing bowl. roast kasa-kasa separately and add to the mixing bowl. add cardamom powder, nutmeg powder and dry ginger powder to the mixing bowl and mix well.

laddu making

Heat the same pan and add the jaggery and 1/4 cup of water. make the jaggery syrup either of single string consistency or thicker than that. add the jaggery syrup to the mixing bowl and give  a mix.

Dry fruits and nuts

Once the mixture turns warm, shape the mixture into laddus. Garnish the laddus with grated dry coconut. This recipe yields about 8 or 10 laddus. these laddus keep well in room temperature for about 3-4 days.

dry fruits laddu with edible gum

Notes:

Adding edible gum / gondh is optional. just the stickiness of dates is enough to bind the laddus.

As per your preference, add the nuts and dates.

Bombay gondh will be available at nuts and spices shop or in Nilgiris shop

Choosing ready made gulab jamun mix and making jamuns are easy now a days. but making gulab jamun from scratch gives great satisfaction and we know how pure and good it is, when we make at home. also the texture and taste should beg with the popular ready made gulab jamun mixes. i have decided early, that this diwali i should be preparing khoya jamun and also i know i will be following cilantro's recipe! it turned out perfect and its a flawless recipe, so do try this khoya gulab jamun and enjoy this diwali! friends and family tasted the jamuns and it won everyone's heart! those who tasted, asked the recipe for it. so it proves!


When you mix the khoya and maida together, your gulab jamun mix gets ready! so why not you try next time?

My son got overjoyed on seeing the bowl of jamuns, when he returned from school, he also helped me in clicking pictures!


makes - 30 jamuns approx
Preparation time - less than 20 minutes.
Recipe from: cilantro
check out how i made khoya a day before preparing jamuns.

Ingredients:

Maida / All purpose flour - 100 gms
Baking soda - 1/8 tsp(a small pinch)
Oil - 200 ml 

To make sugar syrup:

Sugar - 200gms
Water - 1 cup
Cardamon - 2
Saffron - few strands

Method:

Sieve the Maida and baking soda together twice and transfer it to a wide bowl.

Homemade khoya

check how i made khoya with 1 and half litres milk. you will get khoya to make more than 40 - 50 gulab jamuns with it.

Mix the khoya little by little to the flour by hand, first it will look like bread crumbs and then you will feel like making chapathi dough, sprinkle a tsp of water and combine all together and form a smooth dough. add a tsp of oil to make the dough smooth and non-sticky to your hands. Pinch a small piece of dough and shape them into a small lemon sized one. make sure, you do not apply pressure while rolling with your hands. also avoid big cracks in the ball by rolling till its a smooth ball.


When the dough is getting ready, heat oil in one pan and prepare sugar syrup in another pan. 

To make sugar syrup, take 200 gms of sugar in a pan and add a cup of water about 200 ml. stir to dissolve the sugar. switch off the flame when the sugar syrup reaches half a string consistency. add crushed cardamom and saffron strands to the syrup and give a stir.

When the oil gets hot, low the flame for about 2 minutes and then start dropping the jamun ball's to the oil. slowly give a stir and wait till the balls reach golden color. it takes about a minute in low flame. make sure you cook jamuns in low flame.


Once the jamuns are fried till they turn golden color, remove the balls and add to the hot sugar syrup. pour a ladle of syrup over the jamun and thus giving hot sugar syrup bath, it will turn soft, sweet and fluffy.

This way remove all the jamun to the sugar syrup and let the jamun rest in sugar syrup for about 15 minutes before you start to serve hot.


Tip's:

If the oil is too hot, jamun's break in oil. also use sufficient oil to fry so that the jamun balls immerse in oil while getting fried.

If buying khoya from store, grate the khoya and start mixing with the flour, so that no khoya lumps are formed.