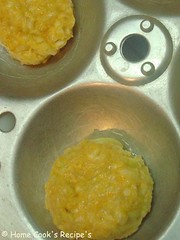
Nankhatai is a cookie, famous in pakistan and in india. Nankhatai is a basic eggless cookie made with clarified butter(ghee). When Bina posted her nankhatai recipe on daily tiffin, i tried it immediately and fell in love with these cookies, but it took too long (2 years) to post here.


whenever we crave for crispier biscuits, i would make nankhatai in minutes. its so easy to make. moreover, you can make it quick.

                                                               
 Nankhatai


Yields - 30 cookies approx.

Preparation time: 15 mins
Baking time - 10-15 mins.
Recipe from : Daily tiffin  - Bina


Ingredients:


  • Maida / All purpose flour – 2 cup’s (200gms)
  • Sugar – 1 cup
  • Cardamom – 8
  • Ghee – ¾ cup
  • Baking powder – ½ tsp
  • Nuts to garnish(pista, cashew and badam)


Method:

      1. Pre-heat the oven at 150C for 10 minutes.

      2. Line your baking tray with butter paper and set aside.

      3. Powder the sugar along with cardamom pods.

      4. Sieve the maida flour along with baking powder. Also sieve the powdered sugar upon maida.

      5. Mix the flour well with your hands.

     6. Add Ghee to the flour and keep mixing, first the flour becomes like crumbles. keep on adding the    ghee till flour comes together as a smooth pilable dough. Do this process patiently, this process takes 10 minutes. (it consumes really lots of ghee, so go ahead and forget the calories.)

      7. Once you get the smooth pilable dough, pinch a small ball of dough and roll it with your palms. Slightly press it with your palms, so that the ball flattens a bit. Place the flattened ball over the butter paper. Likewise fill the butter paper. Press nuts of your choice over each nankhatai.


   8. Bake the Nankhatai in pre-heated oven at 150c for 10-12 minutes. Till the bottom of the nankhatai turns light brown in colour. Change the sides of tray in between, to ensure even baking.

   9. Remove from the oven and let it cool for 5 minutes, then transfer to cooling wrack and let it cool for another 5 minutes.


    10. Transfer the cooled nankhatai’s to an air tight container.

Serve with Hot tea, tell you what, thats the perfect way to eat these cookies.


Do try these delicious easy to make cookies. these cookies were crispy. these cookies were hit at home and kids loved it a lot.

I also made in heart shape, which turned out good too. so you can try different shapes.

My Cutlet experiments finally ends here. I have tried to make cutlet before, but ended up in mess. cutlets will break on oil while deep frying or the cutlet drinks more oil. after all such failed attempts, here is my Just Pass Venture for you all. All Thanks to Divya's recipe and Namratha's recipe.

Veg Cutlet

Ingredients:

Potato - 2

Carrot - 1
Beans - 6
Onion - 1
Green Peas - fistfull
Beetroot - 1/4

Oil - 1/2 tsp
Saunf / Sombu - 1/4 tsp
Green Chilli's - 2
Ginger - 1 inch size

Corriander powder - 1 tsp
Corn Flour - 1 tsp
Garam Masala - 1/2 tsp
Corriander Leaves - 1 tbsp (finely chopped)

Maida - 2 tbsp (mixed with 3 tbsp's of water)
Wheat Bread - 4 slices

Vegetable Cutlet

Method:

1. Toast 2 slices of bread, trim the corners, cut into small pieces and grind them into coarse powder.Now Bread crumbs are ready. you can also use readily available Bread crumbs from the bakery shops.

2. Boil the Potatoes, peel its skin, Mash them finely, refrigerate for 1 hour atleast.
Finely chop the other Vegetables.

3. Steam cook the finely chopped carrot, beans, green peas and beetroot. after steam cooking, cool and mash them all together. strain the excess liquid from the vegetables.

4. Heat 1/2 tsp oil in a pan, add saunf, ginger, green chilli's and saute them. then add finely chopped onions and fry till it turns light golden colour. Now add salt to taste, Garam masala and corriander powder and mix well with the onions.

5. Now add steam cooked and strained Vegetables to the pan and mix well with onions and masala's.
cook on low flame, till there is no moisture content.

6. Now add the mashed potato, corriander leaves and mix with the vegetables in the pan.

7. Remove from flame and let the vegetables get cooled down.

8. Add 1 tsp corn flour to the vegetables and mix with your hands. Then Dip 2 slices of bread in water, squeeze the water and just add the bread pulp to the vegetables and mix well with hands. knead them all together.

Veg Cutlet

9. Then pinch a lemon sized vegetable mix and shape them in round shape. use cookie cutter to shape or a bangle. or even a round shaped tumbler.

10. Dip the Cutlets in maida mix first and then wrap them with bread crumbs.

Vegetable Cutlet

11. Arrange the wrapped cutlets in a plate and cover them with cling flim or with foil sheet. store the plate in fridge for about 30 minutes at least. You can store even overnight and thaw it for 30 minutes before frying.

12. Heat 1/4 cup of oil in a pan and Deep fry the cutlets, till they turn into golden brown colour in medium flame.

13. Remove the Cutlets on Tissue paper, serve with tomato ketchup. a cup of Masala Chai will make a nice pair!

Notes:

1.If serving for kids, you can use green chilli paste instead of finely chopped green chilli's.

2. After storing the cutlets in fridge, bring the cutlets to room temperature by taking them out 10 minutes before frying.

3. Using Wheat bread or brown bread makes these cutlets an healthier ones and its tastes great too.

Iam happy, that we friends started our Interactive Cooking Session. We have decided to try few recipes on every friday. I play the Instructor Role and we are really having fun and food at every session. Today is the second friday we met and so far 4 recipes have been tried. We all put our ideas, while cooking and that makes the session quite usefull to everyone. So our Interactive Cooking Session sounds great isnt it.

We choosed to prepare this kofta, unfortunately we could'nt find bread crumbs.  so we toasted 2 slices of wheat bread and trimmed its edges. cut the bread into small pieces and we powdered in mixie and got bread crumbs. it just worked perfect!!

Aloo Paneer Kofta

I dont like to fry paneer, but frying paneer for this kofta was excused when i tasted it. Its one of the richest  deepfry. i referred many sites, but combined the recipe from sia's Malai Kofta and from ecurry.

Potato Paneer Kofta:

Makes about 12 small Kofta's

Ingredients:

2 Large Potatoes
125 gms Paneer
2 Green Chilli's
1 tsp Garam masala
2 tsp's Bread Crumbs
2 tsp's Corn Flour
2 tsp's Milk Powder
Salt to taste
1 tbsp Chopped Corriander Leaves
Oil to Deep Fry (1 cup of oil)

To stuff:

2 tbsp Cashew bits
2 tbsp Dry Grapes

Kofta's

Method:

Pressure Cook the Potatoes upto 4 or 5 whistles. peel the skin of the potatoes and mash them.

Grate the Paneer very finely. also chop the Green chilli's finely.

In a Large Bowl, Add the mashed Potatoes, Grated Paneer, finely chopped Green Chilli's and chopped corriander leaves & mix well.

Add salt to taste, Garam masala, Bread Crumbs, Milk Powder and Corn Flour and mix well.

Knead them all together. knead, as we do our chapathi dough. Shape them into small balls.

Make a dent on the kofta ball's, stuff it with one cashew bit and 2 dry grapes. likewise stuff all the kofta balls. Each Kofta ball should be of  a medium lemon size.

Heat 1 cup of Oil in a Pan. Fry the Kofta's 2 or 3 at a time. Make sure to reduce the flame while adding the kofta balls. deep fry the kofta, till it turns into golden colour. [Frying them reminded me of doing gulab jamun, so use the same technique while we fry gulab jamun's]

Remove the Kofta's to a tissue paper and then serve.

Serve with ketchup or use the kofta's in biryani or in Malai Kofta.

So you can guess what my next post is going to be.

Notes:

You can also add a drop of fresh cream and then cashew bits and dry grapes for stuffing.
Anyway stuffing is optional.

Bread Crumbs, corn flour and milk powder all act together as binding agent. Bread Crumbs or Corn flour is a must for these kofta's.

If you dont have bread crumbs, toast 2 bread slices. trim its edges and cut the bread into pieces. grind the bread pieces in mixie to get bread crumbs.

Three Years back, when i tried to make murukku, it turned out to be a big flop. then i never dared to give a try. But this year, i wanted to try at any cost. To my Surprise, i made it perfect. My Thanks to Raji of Raks Kitchen. Her Ribbon Pakkoda is the base for this Murukku Recipe.

Murukku

Ingredients:

  • Idiyappam Flour - 2 cup's. / 500 gms
  • Besan Flour / Kadalai Maavu - 1/2 cup (or) 120 gms
  • Pepper Powder - 2 tbsp
  • Butter - 2 Tbsp ( at Room Temperature)
  • Sesame seeds / Ellu - 2 tbsp
  • Salt to Taste
How to Prepare?

Mix all the above ingredients in a wide vessel. By keeping on Sprinkling little water, keep mixing the flour's, till they all come together like our chapathi dough. Form Cylindrical shaped Dough, that could fit into the murukku press. For above 500gms of flour, 4-5 cylindrical pieces should shape up.

Heat 2 cup's of Oil in a Thick Pan.

Get Ready with Murukku Press. For the above murukku shape, use a Star shaped disc. Fill the prepared Cylindrical dough into the Murukku Press and close it with its lid.

Press the dough over the heated oil. Depending upon the size of the pan and the Oil in the pan, Press the dough. Need not overload the Pan. Its better to Press a Cylindrical dough in two  or three phases to ensure even cooking.

Fry till the murukku turns into golden colour in high flame and reduce the flame, then slowly remove them from oil to a jalli or place them over tissue paper.

* To make them in round shape's: In the back side of a Slotted Spoon / Jalli Karandi, press the dough.
Give circular motion while pressing. then drop the murukku along the slotted spoon slowly into the oil. This way, you can make perfect murukku shapes. but its time consuming, to finish up the whole batch.

Again in slow flame, start pressing the dough over the oil. once pressing is done, increase the flame. then reduce the flame, once the murukku is fried to golden colour.

After they have cooled, store them in an air-tight container and enjoy snacking these Crispies..

Mullu Murukku

The whole work took me 50 mins. It was tiring to stand near the oil Pan all alone. If you have company, you may not feel tiring. But it was worth, when people at home enjoyed. especially when my son enjoyed eating.

Now this is my entry for Diwali Sweets and Snacks event.

Diwali event Logo

Keep Sending your entries till November 15 nth.


Though this post may sound silly. But for some people, who are hooked to pizza hut stuff's like me, will sure Enjoy this Post. Ever since i discovered Round shaped Breads (Roundels) at Spencers Daily, I was thinking of preparing these Garlic Bread Exotica to my Family. Finally managed to prepare these this week. If you Could not find Round shaped Bread's, then Cut the Sandwich Bread in Round shape. Iam sure it will also turn good.

Garlic Bread Exotica

Get Ready with the Following To Prepare these Garlic Bread - Exotica

1. Round Shaped Breads (or) Cut the Sandwich Bread in Round Shape's - 6 breads
2. Garlic Flavoured Cheese - 2 tbsp's
3. Red Onion - 1
4. Tomato - 1
5. Capsicum / Bell Pepper - 5 spoons chopped
6. Green Chilli - 1
7. Butter - 1/2 tbsp


How to Prepare?

Chop the Onion, Tomato and Capsicum into small cubes. Finely Chop the Green Chilli.
Mix the chopped onion, tomato, capsicum and green chilli together. add little salt to taste to veggies and mix well.You can also add chopped Olives to it.

Apply butter on one side of the breads and toast them in a Pan on medium flame.
To the other side of the Bread, spread the garlic cheese and spoon in some veggies over the cheese spread on bread.

To Roast on Tava:

Place the Breads in tawa, with the toasted side facing the tawa. close the tawa with a lid and let the bread get toasted for 2-3 minutes at slow flame.


or Grill / Broil the Breads at 250C / 500F for 3-5 minutes.
After Grilling, let it cool for 2 minutes and serve Hot.

It tastes Great With Soups. Iam Sure, This will be a stunning appetizer's in Party. I prepared these Breads, without the cheese spread, and i liked this way much.

Spicy Garlic Bread

Toppings with Onion and Green Chilli

While serving for Kids Keep in Mind:

* Avoid Green Chilli's, as they may bite it. Little Pepper Powder can also be used instead of chilli's.

* You can also add cooked sweet corn kernels along the veggies.

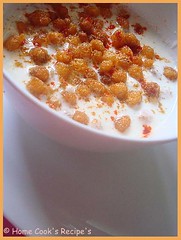
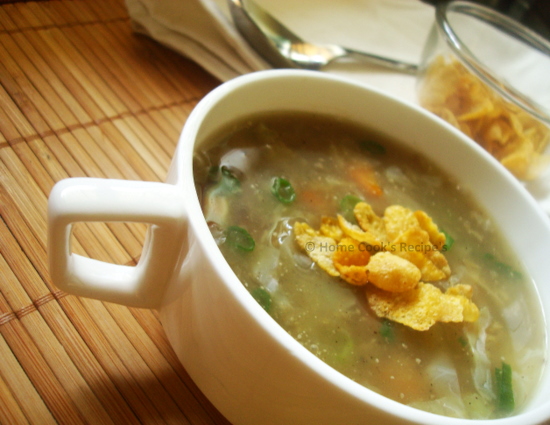
Day's roll on so fast. I have Lot's of work coming by, in two day's. I wanted to post and mark my presence here before that. Today My Son's school re-opened after Christmas Holiday's, and life turns organised for me now again. Here in Chennai, Street Side Soup Stall's are becoming Famous. Once I tried Vegetable soup in a stall nearby and loved these spiced cornflakes topping's on it. It gave a nice crunch to the hot soup along. so when i prepared vegetable soup today, i definitely needed these spiced cornflakes.

Spiced Corn Flakes

Ingredients:

Cornflakes - 1 cup
Ghee - 1/2 tsp
Curry Leaves - 4
Chilli Powder - 1/4 tsp
Peanuts - 1 tsp
Salt - a pinch

Method:

Heat the Ghee in a Pan, add peanuts and roast it, till it turns into golden colour. slow the flame. Now add curry leaves and roast it. add chilli powder and salt and mix well.

Now toss the cornflakes with spices from the pan. toss it well.

Store it in an air-tight container.

You can add this to soup's. also you can have these spiced cornflakes with sambhar rice or rasam rice.

This is a very quick post. In my Next post, i will share the vegetable soup i prepared, to which i added these cornflakes.

Did I tell u my New Year Resolution's,

1. Try to do all your work, without expecting other hand's. (This mean's don't expect from maid..This decision came after she went on leave for 45 day's)

2. Eat more Fruit's and Vegetable's and boost Immunity.

3. Walk for 20 minute's a day.

4. Use less Sugar, Maida and Oil for cooking. ( this was my last year's resolution too)

5. Try to blog more healthy recipe's.

6. Improve Photography skill's.

this is what i have decided till now:)


When i googled for Lucknawi cuisine, i was really amazed by the variety of Royal Dish's rooted from there, like Dum Briyani, Shahi Paneer, Kebab's and more and more. Shortlisting on what to try was really a tough job, Lauki was one vegetable, which i dont buy at all, RCI-Lucknawi made me buy these LAUKI'S. when i prepared these Lauki Kofta's, it came out so well and tasted to good. my hubby to like it a lot, and am sure i will keep buying this veggie from now on. Thou i have lot of recipe's lying on my draft lap, iam posting these Lucknawi special's that i prepared last Saturday. they were absolutely delicious. Each dish was very unique on its own.

First Pudhina/Mint-Paneer Rice, it is not a part of Lucknawi food, but it went so well along with the yummy Boondhi Raita.

okay here iam gonna parade my entrie's to RCI-Lucknow...

Let me start with Sweet, Gulab Jamun. Thou its a Bengali milk sweet, it also features in Lucknawi Cuisine. An absolute Ghee Fried Khoa ball's in Sugar Syrup. Does'nt it sound Royal?

Picture 198
I just prepared them with MTR Gulab Jamun Mix. but i want to share some tips.


Tip's for Perfect Gulab Jamun's:

1. The Dough for Gulab Jamun should not be so hard or loose. so exactly follow the measure for water to mix with the flour as per the Packet instructions.

2. The ball's should be immediately fried in medium heated oil in a medium flame.

3. After Frying them, just get them off on a tissue paper. let them cool for a minute, before they are dropped in the hot sugar syrup.

4. The Sugar Syrup consistency should also be perfect, for the gulab jamun's else the sugar get's dried and makes the jamun a dry jamun. so if the packet instruction's states you to boil the sugar water for 15 minute's, do that and keep checking the consistency. the consistency is a before stage of single string consistency.

5. Just put some Saffron strands and crushed Cardamon on the sugar syrup, to get a nice aroma.

and serve them with grated Badam slices for a pefect look.

Now coming to the Starter, Lauki Kofta, i first planned to prepare Lauki Kofta curry, but, the long curry process stopped me. i will try to post a kofta curry recipe soon.

Lauki/ sorakkai Kofta:

Kofta's can be tried with Paneer, Aloo, or Aloo with spinach, etc. Since i have least tasted lauki, i decided to try this Lauki Kofta. hmm..i liked the taste of lauki.(who would'nt like any veggie in the form of kofta?)

To Prepare:

Picture 079
1. First Peel the outer skin of half a Lauki.

2. If possible remove the seed's and grate them.

3. Now squeeze the water from the shredded Lauki with both ur hand's. I did this for 3 times, to remove the water content. [This process is very important, as we are going to deep fry the lauki]


Picture 0814. Mix 3 tbsp of Gram flour/Kadala Maavu, 1/4 tsp of cumin powder, Turmeric powder a pinch and 1/2 tsp of Chilli Powder. and shape them into ball's. i just flatted those balls, so it could get cooked evenly while frying.

5. Heat oil in a pan, and deep fry the lauki ball's in a medium flame, so that it gets cooked inside too.
Serve them Hot or use them while preparing Kofta Curry.

Picture 084
Thank You Nags for your wonderfull Tutorial on How to Blur Background using Photoshop, the ABOVE picture, is what i tried.

After Finishing the Starter, let's come to the main dish Paneer-Mint Rice and its accompanion Boondhi Raita. I just fried small paneer cubes in 1 tbsp of oil and added them to my Mint Rice.

Picture 101

You can check my Mint Rice Recipe Here.
Here comes my favourite Boondhi Raita..

Picture 104Ingredients:
1. Gram Flour-6tbsp
2. Chilli Powder- a pinch
3. Asafoetida- a pinch
4. Cumin Powder - a pinch
5. Oil-1/4 cup
6. Optional's-I added little corn flour and a pinch of sodium-Bi-carb, to make them crisp.
7. Final but not least Jalli Karandi/Slotted Spoon and a spoon, and Ofcourse a cup of Yogurt.

Method:

Heat oil in a pan. In the Mean-time, mix the gram flour with salt, chilli powder, cumin powder, asafoetida. and add little water, say it should be like the consistency of Bajji Mix. a little watery one. When the oil is heated, in the jalli karandi/slotted spoon, pour 2 spoon's of prepared flour batter and keep pressing them on the hole's/slot's. Now fry them. Prepare Boondhi's and keep it aside to let them cool. Then mix with the yogurt. sprinkle some chilli powder and cumin powder as a final touch. this is an absolute drool worthy raita.

Picture 099

Still more to come on RCI-Lucknow
It's nearing the deadline for RCI-Lucknow. So Cook up and post fast.

I know, there are many die-hard fans for Saravana Bhavan Kaima Idli's. But iam not a great fan of it because, iam a die-hard fan of Tandoori idli, which is almost similar to kaima idli, except the spicy cashew gravy topped upon it. Soon i will post the recipe of my favo Tandoori Idli.


DSC05268


These Kaima Idli's are real sinful idli's as they are deep fried even after cooked. Sin once a while is excused, i hope.


Ingredients:

Left Over Idli's: 4 [Cut into Square shape]
Onion: 1 [Finely Chopped]
Tomato: 1 [Finely Chopped]
Garlic: 4 [Finely Chopped]
Green Chili: 1 [Finely Chopped]
Green Capsicum: 1/2 [Finely Chopped]
Curry Leaves: 10
CorrianderLeaves: 2tsp [Finely Chopped]
Oil: 1 Cup [To Deep Fry the Idli's]
Oil: 2 tsp [To Saute the vegetables]
Chilly Powder: 1/4tsp [Adjust according to your Spice]
Salt: 1/4tsp
Lemon: 1/2 [juice]


food and travel


Method:

1. Cut the Idli's in square shape, as shown in picture and Deep Fry Them. If you have refrigerated the left over idli's, you have to get back those idli's to the room temperature before frying.

2. In a Pan, Heat oil, add mustard and let it pop. Now add Finely Chopped Garlic pod's and Curry Leaves and Saute.

3. Add the Onion's and saute it. Add Tomatoes and saute it well, so that it get mixed together with the onion's. add salt, turmeric powder and mix well.

4. Now add the Capsicum and saute them well. add the chilli powder. I preferred to add Kashmiri Chilli Powder, to add a little bit colour to the dish. mix well.

5. Add Your Fried Idli's and mix well with the masala's. add corriander leaves, before switching off the flame.

6. Serve by adding lemon juice over the kaima idli's.


DSC05280


Taste's Best with Onion Raita.

Posting the recipe for kaima idli is a long back dream coming true for me today. Hope you will try this only with left-over idli's. i dont want fresh idli's to take oil bath:)

Enjoy Your WeekEnd!

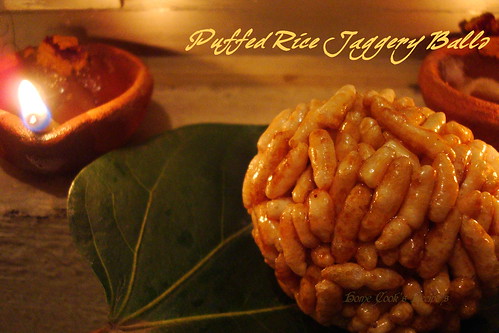
Puffed Rice-Jaggery Ball's, I assume it is everyone's favourite snack. When we try this at home, its a real pleasure to present it before the family and say, that u prepared it. I did it and received raised eye-brows reactions and thus here i am presenting it before you all.It is not difficult to prepare, but You need to be little aware of the consistency of the jaggery syrup for this.

Puffed Rice Jaggery Balls front of Deepam

I prepared these Puffed Rice-Jaggery Balls for Karthigai Deepam. I could only find time, in this new year to post it for you all..

The Ingredients Here..
  • Puffed Rice-200gms
  • Jaggery-1/4 Kg(Grated)
  • Chopped Coconut-10 pieces
  • Cardamon pods-2
  • Water-Just to the level of Jaggery in the pan.
Method:

yyu Grate the Jaggery and put it in a pan. Pour the water so that the jaggery is made wet or just to the level of jaggery. say, if the grated jaggery comes to half cup, then half cup water is enough.
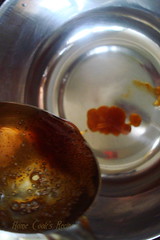
yyu Let the Jagger Dissolve in the water. after it had dissolved, filter it and shift it to a thick bottomed vessel, and place it on high flame.

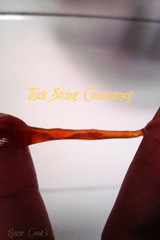
yyu Let it Boil for Five minutes and keep checking the consistency, by dropping a drop of syrup into a bowl of water. the syrup should not dissolve in water, instead it should sit firm on the bottom of the bowl.

Checking For ConsistencyThick String Consistency

yyu When the syrup sits on the bottom of the bowl, slower the flame and add the crushed cardamon pods to it. Now switch off the flame.

yyu Have the Puffed Rice and the Coconut in a large bowl. Pour the Hot jaggery Syrup to the bowl and mix it with a Spoon or Fork.

yyu After a minute apply Oil on your palms and slowly start shaping them into ball shape. keep applying oil on your palm's after shaping two ball's. The oil is to avoid sticking of puffed Rice and Jaggery on our hands.

yyu Now place the balls in a air-tight container. Its texture is very good even for two days.

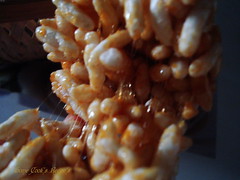
Look at the Chewiness......
Chewy Texture

The Chewy Texture is so good, if you don't want it to be so chewy, then choose the earliest stage of the jaggery syrup. There are different puffed Rice available, if you want the balls to be crispy, the you have to choose certain puffed rice.
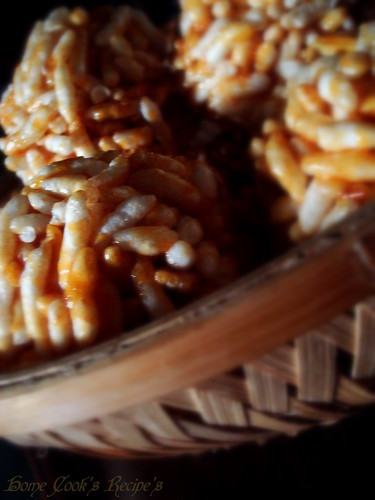
Basket full of Delights..

Puffed Rice Jaggery Balls

This Poha Mixture Recipe is from my Dear Friend. She told me about this yesterday..and today iam blogging this..then you got to imagine..how it would have tasted.

a very simple recipe..a crowd pleaser, tummy filling one..rest you should try and let me know.


Aval/poha mixture along with Mint tea.

Ingredients:
1. Thin Poha/Aval- 1 cup
2. Peanuts- 8
3. Cashews- 4
4. Raisins- 8
5. Green Chilli-1( you can increase if your spice level is high)
6. Ghee- 1 spoon(to roast cashews and Raisins)
7. Curry leaves-8
8. Salt

Method:
In a Wide kadai..put the Thin Aval and roast them well..soon it turns crispier(you have to taste to check it). Now transfer it into a bowl. roast the peanuts in the kadai. add it to the bowl. add a spoon of ghee..roast the cashews and raisins. and them to the bowl. fry the finely chopped green chilli slices and the curry leaves crispier and add it to the bowl. add salt(as required) to the bowl and mix well.

Is it not easy...It tasted so good..raisins certainly added up the taste..


I was thinking what could be the name reason of the word cutlet.


here comes the meaning for it:


(i) A thin slice of meat, usually veal or lamb, cut from the leg or ribs.
(ii) A patty of chopped meat or fish, usually coated with bread crumbs and fried; a flat croquette.


ohh..people have substituted potato for meat. can anyone suggest a name for potato cutlet(ordinary vegetarian cutlet).


Peanut Cutlet:

Recipe Source: Foodie's of Timesnow News channel.

speacilaity of this one is...this is OIL-FREE cutlet.

hopefully we can call it as sinless cutlet.


Ingredients:


1. Potato-3(Boiled and Mashed)

2. Corriander Leaves/cilantro-1/2 cup(cutted into pieces)

3. Green Chilli's-2

4. salt-as per your taste

5. Peanut( a handfull.....blend it in mixer..it just looks like bread crumbs)


Method:


Add corriander leaves, salt, chopped green chilli's to mashed potato and mix well. shape it in coin form. now apply the crushed peanuts on both sides of coin shaped potato. fry them in hot tava. need not use oil..since oil from peanut is sufficient for it to get roasted down.


it fills your tummy also satisfies your taste buds.


Sprouting the legumes are one of the nicest feelings..holding them on hand is just like holding the baby, these are the chick peas that i sprouted for the first time..and this idea of making vada's emerged suddenly..it just took 5 minutes for me to prepare this.


Ingredients needed to make this vada:

1. Sprouted chick peas- 1 cup
2. Green chilli-1(finely chopped)
3. Salt to taste
4. Oil to fry
5. Roasted gram/pottu kadalai/roasted channa dhall to make the mix little tight.(may be 2/3 spoons)

Method:
Mix the green chilli chops to the chick peas and add little salt and grind them coarsely.
if it goes watery(it happened to me), add some roasted gram powder to make it little thick.
it came out really tasty. to my surprise it was crispier also. unsprouted but soaked overnight chick peas can also be tried.
try this healthy vada. i would like to hear your comments. Iam Proudly sending these vada's to the Legume Affair, hosted by Susan, The Well-Seasoned Cook.


have you ever tried urad dal and chana dal vada...it will be off different taste..like both the dalls taste will reflect.
Ingredients:
1. Urad dall-1/4 cup
2.Chana dall-1 cup
3.salt
4.oil to fry
5.red chilli
6.corriander leaves
7.curry leaves
Method:
Soak both the dalls togeather for 1 hour. after that add red chilli,salt and sprinkle some water and grind it well. now add chopped corriander leaves and curry leaves to it and mix it well with the grinded dough. now take a small ball of the dough and fry it heated oil.