Brownies are my all time favorite dessert dish. a slice of brownie topped with a scoop of vanilla ice cream and chocolate syrup drizzled over, makes me go crazy. This time i tried egg less brownies. i substituted egg with condensed milk and orange juice. that is a wrong combination of mixing condensed milk and orange juice, as the milk gets curdled. yes it curdled a bit, but once i added the flour, everything went fine and it resulted in yummy and delicious brownies. I  managed to click step wise pictures, but could not click few steps. excuse me for that.


You can skip the orange juice and add water for the measurement told, along with the dark chocolate while melting it. i will explain this in step wise pictures, so you can get a clear idea.


When you are baking egg less cakes or brownies, the recipe either calls for Milk, condensed milk or butter milk. and also vinegar or any other citric based one like orange juice is added. actually the citric when mixed with baking soda and baking powder(its a chemistry stuff) gives you a fluffy soft cake. 

Ingredients:

1 cup all purpose flour / Maida
1 tsp baking powder
1/2 tsp baking soda
3/4 cup of Dark chocolate
30 ml of water
65 ml of Orange juice
1/2 cup(116 gms) of Butter
3 tbsp of powdered sugar
200 gms of Condensed milk
5 almonds or walnuts  finely chopped

Method:


Prepare for double boiling, to melt the chocolate, by heating a larger vessel with water up to its 3/4 th level and fit a small vessel into it. Chop the dark chocolate and measure it to exact amount of 3/4 cup. drop in the chopped dark chocolate and melt it in slow flame. add 30 ml of water so that the chocolate on melting do not stick to the pan and comes out as a smooth chocolate sauce. (if you are skipping orange juice add 95 ml of water).


Mix flour,baking powder and baking soda together for at least thrice, so that they all get mixed together evenly.


Measure half cup of butter, reserve a tbsp of butter from it for greasing the baking tin. Cream half cup of butter and 3 tbsp's of powdered sugar with a electric mixer or whisk for about 3-4 minutes in a mixing bowl till you get a smooth pale and creamy mixture.


Look at the creamed butter and sugar mix, how pale and creamy it is? next add 200 gms of  condensed milk to the mixing bowl, i poured about half of my condensed milk tin. again beat this mix till they mix well.


Pour in the orange juice and melted dark chocolate to the mixing bowl and beat just for a second. then add in the sifted flour( i forgot to click adding flour) and beat well, till the flour gets mixed. Line a 10" inch pan with aluminium foil sheet and grease with butter on the sides and bottom of the tin. Pour the mixed batter in the mixing bowl to the greased tin evenly. add in the chopped nuts on the top( i forgot to click this step as well). tap the tin on kitchen counter top once so that air bubble's escapes.


Pre-heat the oven to 180C for about 10 minutes and bake the brownie for about 40 minutes at 180C till a tooth pick inserted to the center of the brownie comes out clean. once done, remove from the oven and let it cool on wire wrack for about 10 minutes, then make them into slices and serve warm.

Notes:

1. I used a small baking 8" baking tin, which made my brownies shrink in the middle of the pan, so use a 10" inch pan.

2. If you want to add egg's, then add 2 big egg's in place of condensed milk and add 1/2 cup of powdered sugar ,while creaming butter and sugar.


I know, there are many die-hard fans for Saravana Bhavan Kaima Idli's. But iam not a great fan of it because, iam a die-hard fan of Tandoori idli, which is almost similar to kaima idli, except the spicy cashew gravy topped upon it. Soon i will post the recipe of my favo Tandoori Idli.


DSC05268


These Kaima Idli's are real sinful idli's as they are deep fried even after cooked. Sin once a while is excused, i hope.


Ingredients:

Left Over Idli's: 4 [Cut into Square shape]
Onion: 1 [Finely Chopped]
Tomato: 1 [Finely Chopped]
Garlic: 4 [Finely Chopped]
Green Chili: 1 [Finely Chopped]
Green Capsicum: 1/2 [Finely Chopped]
Curry Leaves: 10
CorrianderLeaves: 2tsp [Finely Chopped]
Oil: 1 Cup [To Deep Fry the Idli's]
Oil: 2 tsp [To Saute the vegetables]
Chilly Powder: 1/4tsp [Adjust according to your Spice]
Salt: 1/4tsp
Lemon: 1/2 [juice]


food and travel


Method:

1. Cut the Idli's in square shape, as shown in picture and Deep Fry Them. If you have refrigerated the left over idli's, you have to get back those idli's to the room temperature before frying.

2. In a Pan, Heat oil, add mustard and let it pop. Now add Finely Chopped Garlic pod's and Curry Leaves and Saute.

3. Add the Onion's and saute it. Add Tomatoes and saute it well, so that it get mixed together with the onion's. add salt, turmeric powder and mix well.

4. Now add the Capsicum and saute them well. add the chilli powder. I preferred to add Kashmiri Chilli Powder, to add a little bit colour to the dish. mix well.

5. Add Your Fried Idli's and mix well with the masala's. add corriander leaves, before switching off the flame.

6. Serve by adding lemon juice over the kaima idli's.


DSC05280


Taste's Best with Onion Raita.

Posting the recipe for kaima idli is a long back dream coming true for me today. Hope you will try this only with left-over idli's. i dont want fresh idli's to take oil bath:)

Enjoy Your WeekEnd!

Being a Sambhar Fanatic, Iam trying as many sambhar varieties as i can, so that my hubby don't get bored of it. During our Hostel Stay, we used to be served with this sambhar so frequently. The Potatoes in Sambhar was new to me those days, and i used to complain to my parents, that the canteen people don't have any other veggie other than potato to put in sambhar. But only now i leant that, It was just Potato Sambhar.
This Chettinaad style of sambhar was different from our regular sambhar. This has three different spices in it, like pepper, Green chilli's and Dry Red Chilli's. This Spicy part, really makes it different and it is best when had along with Idli's and Dosa's rather with Rice.

chettinaad sambhar

Ingredients:

  • Potato-1(Peel the skin, cut it thin and into small pieces)
  • Onion-1
  • Tomato-1
  • Green Chilli-2
  • Dry Red Chilli-2
  • Pepper Corns-1/2 tsp
  • Tuvar Dal-4 tbsp's
  • Turmeric Powder-a pinch
  • Corriander Leaves(finely chopped)-2 tbsp's
For Seasoning:
  • Oil-1 tbsp
  • Mustard-1/4 tsp
  • Cumin-1/4 tsp
  • Asafoetida Powder-a pinch
  • Curry Leaves-8


Method:


yyu Cook the Tuvar/Toor Dal in the Pressure Cooker upto 4-5 whistles, till it is cooked mashy.
yyu In a Wide-Bottomed Pressure Cooker, Heat the oil for Seasoning and add mustard. when it makes sound, add cumin, asafoetida powder and curry leaves and Dry Red Chilli's. saute them.

yyu Add Thin Sliced Onion's and saute along till it gets half cooked. add Green Chilli's and Chopped tomatoes and thin sliced small potato pieces.

yyu Now add the Mashed Tuvar Dal and a cup of water. add the turmeric powder, Salt, Pepper corns and chopped corriander leaves.

yyu Mix well and cook it in pressure cooker upto 2 whistles. Wait for the steam to get released and add a tsp of ghee before serving.
Try this for a weekend Brunch, iam sure you all will like it.

I went missing from this Blog-World, as my son poured a glass of water on to my monitor, its transformer burnt into smokes(it was a bit scary scene for me and for my son it was his one of enjoyable moment..) it was indeed a nice experiment by my one and half year old kid-i say..what do you say?

Coming to the Topic of this post..How Clean is your House? I recently took a quiz under this topic from here. It was funny to read the questions and to respond. Do take it and analyse your Home cleaning skills.

Well, I will place a small quiz from my part...

1. Is your Pillow cover clean, Did you replace it at least a week before?

2. How About Your Curtains? Is it Clean? and was is washed 3 months back?

3. How are your Kitchen Napkins? Are they Tidy?

If your answers are yes..Cheer Up, You are really a Better Person!!!

I will give you some tips to make your home fresh.

1. Open up all your Window's and Door's and let the sunlight get into your house.

2. Replace your Kitchen Napkin's with Fresh one's. also have seperate Napkins for your Gas Stove, Your Mixer, Your Oven, etc.

3. Wash Your Foot Mats.

4. Always make sure, your Kitchen Sink is not occupied and clean your vessels then and ther when you cook.

thats it for now..

Why am I posting about this, instead of posting some recipe? its because, i havent got back into form, of writing a long recipe. I almost forgot my blogging skills. sure, i will gain back all my memories very very soon.

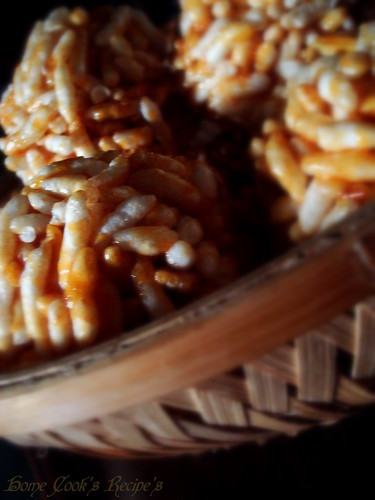
Puffed Rice-Jaggery Ball's, I assume it is everyone's favourite snack. When we try this at home, its a real pleasure to present it before the family and say, that u prepared it. I did it and received raised eye-brows reactions and thus here i am presenting it before you all.It is not difficult to prepare, but You need to be little aware of the consistency of the jaggery syrup for this.

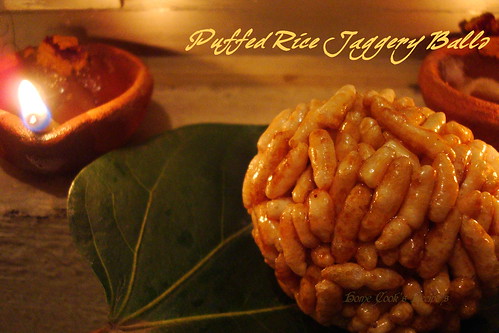
Puffed Rice Jaggery Balls front of Deepam

I prepared these Puffed Rice-Jaggery Balls for Karthigai Deepam. I could only find time, in this new year to post it for you all..

The Ingredients Here..
  • Puffed Rice-200gms
  • Jaggery-1/4 Kg(Grated)
  • Chopped Coconut-10 pieces
  • Cardamon pods-2
  • Water-Just to the level of Jaggery in the pan.
Method:

yyu Grate the Jaggery and put it in a pan. Pour the water so that the jaggery is made wet or just to the level of jaggery. say, if the grated jaggery comes to half cup, then half cup water is enough.

yyu Let the Jagger Dissolve in the water. after it had dissolved, filter it and shift it to a thick bottomed vessel, and place it on high flame.

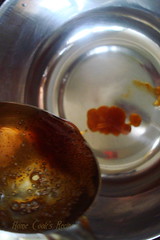
yyu Let it Boil for Five minutes and keep checking the consistency, by dropping a drop of syrup into a bowl of water. the syrup should not dissolve in water, instead it should sit firm on the bottom of the bowl.

Checking For ConsistencyThick String Consistency

yyu When the syrup sits on the bottom of the bowl, slower the flame and add the crushed cardamon pods to it. Now switch off the flame.

yyu Have the Puffed Rice and the Coconut in a large bowl. Pour the Hot jaggery Syrup to the bowl and mix it with a Spoon or Fork.

yyu After a minute apply Oil on your palms and slowly start shaping them into ball shape. keep applying oil on your palm's after shaping two ball's. The oil is to avoid sticking of puffed Rice and Jaggery on our hands.

yyu Now place the balls in a air-tight container. Its texture is very good even for two days.

Look at the Chewiness......
Chewy Texture

The Chewy Texture is so good, if you don't want it to be so chewy, then choose the earliest stage of the jaggery syrup. There are different puffed Rice available, if you want the balls to be crispy, the you have to choose certain puffed rice.
Basket full of Delights..

Puffed Rice Jaggery Balls

My son started to take lunch to his school from last week. first i was very tensed on how he will adjust to eat all by himself. then i was worrying on what to pack for him. In this chennai climate, my curd rice could not withstand, even if i add lots of milk and less curd, climate spoils it! so our most comfort food curd rice cannot be packed for lunch! Past week was like a research period, as i am finding out, what he eats, what he brings back home, what he doesn't even touch and stuff's. till now, vegetable pulao is one safe food to pack. have to find out more. today i tried this fried rice, both my hubby and my son liked it very much and the boxes came empty. update: Now my son asks me to pack this fried rice quite often.

veg fried rice


Last year i completely enjoyed my life along with this sweet blog, which gave so many nice friends. This year, i have few resolutions, of making my cooking with less oil, with less sugar. when i said this to my hubby, he said, don't make me feel old so soon. Then i just left the Sunday's as exceptions. I don't believe in implementing the resolutions right from Jan 1st. I planned them well before and am practicing for the past one month. This Veg Fried Rice, really impressed me, as it can be made in minutes and also i feel the nutrients in these veggies are not omitted, just by sauteing them till semi-cooked. I am sending this off to Eat Healthy-During Pregnancy Event.

vegetable fried rice


                                                            Vegetable Fried Rice

Ingredients:

Basmati rice-150 gms
Sesame oil - 2  tsp's
Carrot - 1
Green Capsicum - 1/2
Cabbage - 1/2
Spring onions - 4
Small onion - 4 / white onion - 1
Garlic - 3 pods
Pepper powder - 1/2 tsp
Soy sauce - 3 drops
Vinegar - 2 drops

Method:

Measure Basmati rice in a cup and set aside. for 1 cup of basmati rice, you need 1 and 1/2 cup's of water.
so measure the rice and water accordingly and set aside.

Wash and soak the basmati rice for 10 minutes. then drain the water completely. In a Pressure cooker, add 2 cups of water and place a bowl of basmati rice along with measured water. add 2 drops of vinegar or lemon juice and little bit of salt for rice. close the cooker with its lid and put on the weight. pressure cook for up to 2 whistles exactly. once the steam escapes, open the lid and remove the rice to a plate and wide spread the rice. add 1/2 tsp of sesame oil and mix the rice with a fork gently.

Cut the vegetables into very thin strips. use the spring onions, onions also. it gives a good taste to the fried rice. if not use small onions or white onions.

In a pan, add 2 tsp of sesame oil, add finely chopped garlic, then add onions and saute till they turn translucent. then add carrot and saute it. then add the capsicum and the cabbage. saute them, till the vegetables are half cooked. add very little salt and 1/2 tsp of pepper powder to the vegetables for taste. finally add 3 drops of soy sauce and mix with the vegetables. switch off the flame.

Add the cooled rice to the pan and mix well with the vegetables. finely chop the spring onions(green part) and add it to the pan and mix well. do all the mixing, when the vegetables remain hot.

Transfer the fried rice to the serving bowl.

Notes:

It is almost a rule for me to add spring onions to the fried rice. also make it a point to finely slice the vegetables.

You may add a bit of ajina motto at the end. but it is best avoided.


Tip:

We add mustard in our cooking, to remove if any poison present in the food. Before adding the mustard, check whether oil is heated and after adding the mustard let them splutter. this just takes less than a minute.

Over the years mustard has been prescribed for scorpion stings and snake bites, epilepsy, toothache, bruises, stiff neck, rheumatism, colic and respiratory troubles.

Wishing You all Very Happy and Prosporous New Year............................
Have a Healthy and Happines filled year ahead.......