jangri5

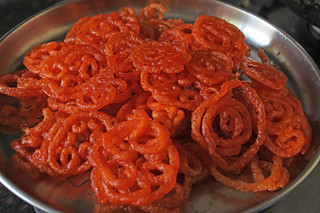
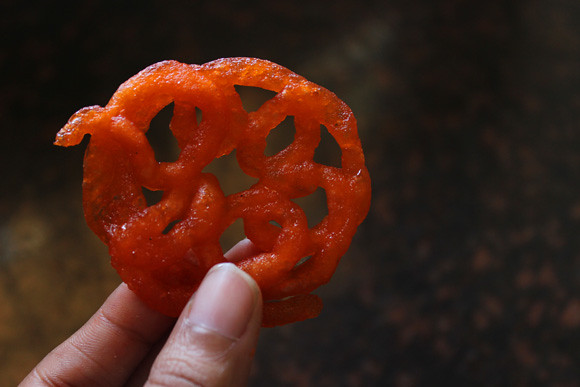
Yes! I made it! I jumped out of joy when i saw my jangri holding its shape, i was very thrilled when i tasted crispy and hot jangris. Jangri is my favorite sweet. I like to eat it warm. My Grand father would buy me warm jangri from sweet stalls, and i would devour it! Bliss!! Every diwali i used to experiment making jangri. after failing for 4 years, this time i cracked the jangri code. everyone appreciated it. My son is my best critic. he said its Nice, but it should be more sweet like the ones in sweet shops. Yes he was right. Sweet shops jangri are more sweeter than mine.


jangri2

Sharmi kept on pushing me to try some sweet for this diwali. Yesterday i tried/experimented making jangri and it was a flop show. Today without giving up i made and here it is. of course there is a proper method in making jangri. i call it as tricks. I will share what all mistakes i made earlier and what worked. so this recipe becomes a fool proof one.

jangri


From the day one i first saw Raks Jangri, i wanted to try. Every diwali i open up her blog and go to her jangri post and drool at her jangris:) Thank You Raks for the inspiration!!

Yields - 25 jangris
Soaking time - 1 hour. you can make whole batch of jangris in 1 hour.

Ingredients:

Whole Urad dal - 1/2 cup
Sugar - 3/4 cup
Sunflower oil - 2 cups
Orange red food color - 2 pinch (or) 1/4 tsp

Method:

Wash the urad dal in water for about 5 times, till you see clear water. Soak the urad dal in water for about 1 hour.


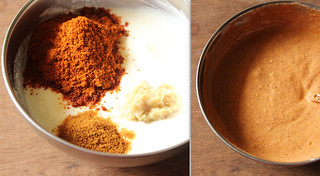
Drain the urad dal and grind it in your mixie jar with little water. grind it smoothly. make sure you grind into a fine paste. it would take 2 or 3 minutes to grind finely. you should see the batter bubbling and going off.


Once the urad dal batter is done, transfer it to a bowl. add orange red food color to it and mix well. If you have a zip lock cover, spoon in the batter into the cover and make a small hole like we make for our mehendi cones. (remember the hole should be small, the batter expands and you get a little thick jangris in oil) i had my cup cake frosting kit and i used it.


To make sugar syrup, measure 3/4 cup of sugar and add 1 cup of water. dilute the sugar and bring it to boil. Do not go for string consistency here. its enough if you get to the stage as we get for gulab jamun. we call it as sticky stage or pisukku padham in tamil.


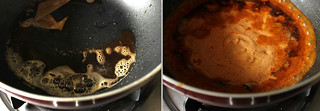
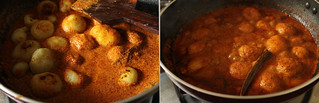
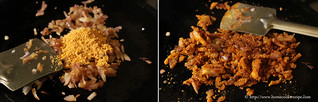
Heat a wide bottomed pan. add 2 cups of oil to it and heat it. Oil should be off medium hot. switch off the flame and draw jangri patterns in oil with your hand some 7 - 10 cms above the oil. after drawing the jangri patterns. switch on the flame to low heat. using a chopstick or paniyaram kuchi, slowly turn the jangri's. it will get cooked in less than a minute. slowly pick the jangri and soak it in sugar syrup for 2 minutes and then transfer it to a clean plate. (do not use kitchen tissue).

jangri3


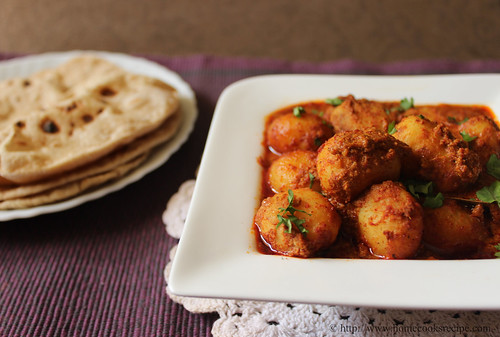
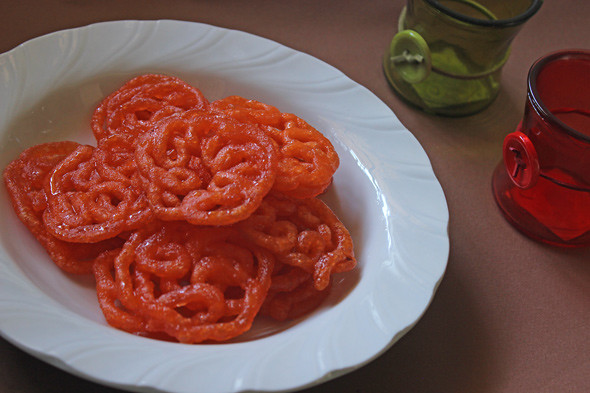
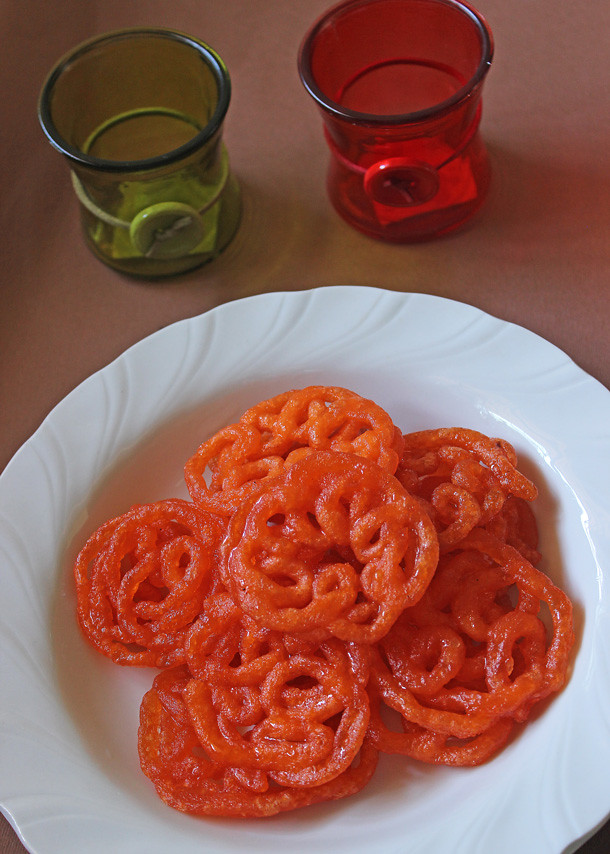
Eat and Serve the Jangri Hot/Warm to your loved ones.

Tricks:

1. Urad dal should be washed well before it is soaked. i washed it for 5 times.

2. Maintain low heat or switch off the flame while making jangri patterns and then you can switch on the flame immediately.

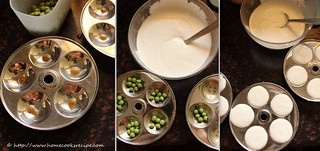
3. Make sure your urad dal batter is not so thick or watery. refer stepwise pics to get the idea of the batter. make sure you grind the batter smooth. you can use grinder, if you are used to grind batter for vada in it.

4. You can use a normal cover or ziplock cover to fill the batter.

5. Do not make sugar syrup with single string consistency. sugar syrup should be little thicker than we get for our gulab jamun.

6. Jangri get cooked very fast. do not fry for longer time.

7. You need not use Raw rice or Rice flour or corn flour along with urad dal. just urad dal gives great jangris.

jangri1


What all mistakes i made earlier-

1. First i grinded the urad dal batter into a very thick one. no it should be of correct consistency as we do for our vada.

2. I drawed jangri patterns in hot oil. then in medium flame, then in slow flame. all got expanded and lost its shape in oil. i switched off the flame and drawed jangri patterns. then i switched on the flame to low flame. finally it worked.

3. Before i used to make single string consistency and it did not work for me. as i said it should be off pisukku padham or sticky sugar syrup consistency.

4. Before i have added rice flour, corn flour, soaked raw rice to the batter to get crispy jangris. without all these jangri came out well today. i consider washing the urad dal well, makes the jangry more crisper. here i reveal my secret for soft idly- i just wash my urad dal once to get soft idly.


IMG_6347

If you want to make changes in your cooking, change the variety of red chilly you use. I have been trying few dry red chilly and its interesting how it changes the color and taste of the dish. Recently i bought these kashmiri dry red chilly and we love the color it gives. Kashmiri chilly powder available in the markets should plead with these red chilies.


IMG_6341

I followed the recipe for Dum aloo, but did not dum cook the curry. It turned out good. The thumb rule to prepare this is you need to use fresh curd rather using sour curd. Lots of spices are part of kashmiri cuisine. Black cardamom, bay leaf, cinnamon, cloves and cumin all give up a great aroma to this curry.

IMG_6334

Though the color of the curry looks dark, it is not spicy at all.

Ingredients:

  • Baby Aloo - 1/2 kg
  • Fresh Curd - 1 cup
  • Ginger garlic paste - 1 tsp
  • Garam masla - 1/4 tsp
  • Ghee - 2 tsp's
  • Bay leaf - 1
  • Cinnamon stick - 1 ' inch
  • Cloves - 3
  • Black Cardamom - 2
  • Corriander leaves - to garnish


For grinding the spices:


  • Kashmiri Dry Red Chilly - 5
  • Cardamom - 2
  • Corriander seeds - 1 tbsp
  • Cumin seeds - 1 tbsp

Method:

1. Cook the baby potatoes in pressure cooker for up to 4 whistles. Oncecooked, peel off its skin and prick them with a fork. Now heat a pan, add 1 tsp of oil and roast the baby potatoes for a minute or two.

IMG_6313

2. First Dry roast Kashmiri red chilly, cardamom, corriander seeds and cumin seeds in slow flame till they change into light brown color.

Starred Photos56

3. Cool and Grind the spices into a fine powder and set aside.

4. Whisk a cup of curd well. add the grounded spice powder, ginger garlic paste and garam masala to the curd and mix well. set this aside.

Starred Photos57


5. In a Pan, add ghee, when its hot add bay leaf, cinnamon stick, cardamom and cloves.

Starred Photos58


6. Slow the flame and add in the curd mix. add salt according to your taste. Once the curd is added to the ghee, give a mix. it will  look like the curdled. but you need not worry. You can add 1/2 or 1 cup of water based on which consistency you need this curry. Then just simmer the flame and close the pan with its lid for 5 minutes and switch off the flame.

Starred Photos59

7. Rest the pan for about 5 minutes and then remove the curry from pan to a serving bowl. garnish with corriander leaves.


IMG_6348


Notes:

Use Fresh curd to prepare this curry.

If you do not have Kashmiri dry red chilli, add 2 tsp's kashmiri chilly powder.


When i was pregnant with my son i used feel very hungry. i would make one thick egg cheese dosa in  2 minutes and get out of the kitchen. those days i hated to stand near the stove. One thick dosa is well enough for a meal. This egg cheese dosa, ragi adai, chapathi wrap with soy granules and noodles used to be my food during my pregnancy. Now i make these egg cheese dosa for my son after he comes home from school. he likes it very much. This is such a long due recipe from my side.


I made a video after a long time. did not have enough patience to edit much. so kindly bear with this video.


Ingredients:
  •  Dosa Batter - 1 cup
  •  Cheese slice - 1 / Processed cheese - 2 tsp's (grated)
  •  Green chilly - 1(chopped very finely)
  •  Egg - 1
 Method:


Beat the egg well and keep aside.

Grease the tawa with a drop of oil and use onion or potato to grease.

Pour the dosa batter and spead the batter. after 30 - 50 seconds, pour the beaten egg over the dosa and tilt the tawa so that egg spreads well. add oil to the sides of dosa and throw in some finely chopped green chillies and cook the dosa on both sides.

If you are using processed cheese, grate it and sprinkle above the egg layer of the dosa. if you are using cheese slices, tear the slices and place over the egg layer of the dosa.

Remove your dosa from tawa and place it on a plate. Fold the dosa when its hot, so that the cheese melts.

Serve egg cheese dosa hot!


Note:

If you are serving for kids, skip the green chilly.


Green peas idly

Recently  when we went to a restaurant i noticed chilli idly as the days special item. out of curiosity i ordered it. even the person who took the order said me, that its newly introduced and i should try it for sure! I thought it will do for me, so i did not even think of placing order for the other items. So when i saw my chilli idli coming in a small bowl, i was clean bold! It was just 5 mini idli's coated with milagaai podi.

Green peas mini idly

Coming to this Green peas idly, recipe is simple and i am sure kids will love this one. its ideal for the kids lunch box. I used my mini idly plates to make this idly. Mustard tadka add up a taste to these idly. you can skip or reduce green chilies if serving for kids.


Ingredients:
  • Oil - 1 tsp
  • Green peas - 1/4 cup
  • Green chilly - 1 (very finely chopped)
  • Mustard - 1/2 tsp
  • Idly Batter - 1 cup
  • Ghee - 1 tsp ( to grease idly plate)


Method: 

Green peas idly

1. First DE-frost the frozen peas or wash and drain the fresh peas and set aside.

2. In a small tadka pan, heat 1 tsp of oil, add mustard and let it pop. then add finely chopped green chilly and saute in low flame. remove the tadka from flame and mix with the green peas.

3. Grease ghee or oil in idly plate. place a spoon of green peas and tadka mixture in idly plates and then pour the idly batter on top of it. steam the idly for 8 - 10 minutes.

Mini idly variety

Serve these peas idly with chutney of your choice. i served with tomato chutney.


pudalangai pachadi

Snake gourd is always cooked as kootu at home until i found this recipe. This Raita recipe is simple and also tastes good with just plain rice. When i tried this raita for first time, me and hubby loved it a lot and it was finger-licking delicious!

snake gourd pachadi

You can either saute the snake gourd or steam cook and add it later to the curd. What makes this raita different is thick curd and the spiciness of the sauteed green chilies.

Ingredients:

Snake gourd / Pudalangai - 2
Green chilly - 4
Thick Curd - 1 cup

For Tempering:

Oil - 1 tsp
Mustard - 1/2 tsp
Urad dal - 1/2 tsp
Chana dal - 1/2 tsp
Dry red chilly - 2
Curry Leaf - 4

For Dressing (optional)

Oil - 1/2 tsp
Chilly powder - 1/4 tsp

Method:

pachadi step by step

Wash the snake gourd and slit into half. remove the seeds and chop into small pieces.
Slit the green chilly and chop into fine pieces.

Take a cup of curd and whisk it well with a fork spoon or a whisk. set the curd aside.

Heat a pan, add 1 tsp of oil and add in the chopped snake gourd and green chilies. saute them and close the pan with its lid and let the snake gourd get cooked in slow flame for about 5 minutes.

Now in a small tadka pan, add oil and add the mustard, and let it pop. then add the urad dal, chana dal, dry red chilly and curry leaves. once the dal turn into golden color remove the tadka from fire.

When the pudalangai / snake gourd gets cooked, transfer them to the curd, add the tempering also to the curd. add salt to taste and mix well.

pudalangai pachadi

For dressing, add 1/ 2 tsp of oil in tadka pan and add little kashmiri chilly powder. give a mix and sprinkle over the raita.

snake gourd raita

Serve along with plain rice.


Notes:

Make sure you use thick and fresh curd for this raita.
Chana dal me hard to bite for few, so its optional to add chana dal in tadka.

This Podi idly is more for adults, as it has onions and spicy podi spread over the idly. When i saw this podi idly recipe on a TV show, i instantly tried it on the same day. We all found this a different and  a tasty way to eat idly, than always opting for chutneys as sides.

Onion and Podi sauteed idly

One of the reasons for me to resume blogging is because of these cute little bottles gifted to me by my very special friend. she kept on insisting me to get back into blogging. Love you a lot Dear!

Podi Idly with sauteed onions

My most favorite is podi idly. I was in boarding school for 2 years. Food there will not be tasty. even though we are supposed to eat, whatever is kept on our plate. if we do not eat, we will get punishments like kneeling down or cleaning work on weekends. those days my mom and my ammumma's podi came as a life saver for me. i would eat 3 idly's with my podi.


This podi idly recipe needs onion, podi and ghee. I will share the idly milagaai podi recipe later. but as of now you can try with your idly podi.


                                                          Podi Idly

Ingredients:

Ghee / Butter - 1 tsp + 1 tsp
Idly - 3
Big Onion - 1
Idly podi - 3 or 4 tsp's
finely hopped corriander leaves - 2 tsp's (optional)

Method of Preparation:

pi1

Heat a dosa tava. add 1 tsp ghee. place the idy in the centre and roast the idly in slow flame for about a minute till you get a light golden crust on the base of idly. likewise flip the idly and roast the other side too. Remove the roasted idly to a plate.

pi2

Add 1 tsp of ghee to the tava in slow flame, add finely chopped onions and saute it till it turns translucent.

pi3

In slow flame, add in the idly milagaai podi and mix well with the onions. add corriander leaves and mix. This should all get done less than a minute. else the podi and corriander leaves will get browned.

podi idly

Switch off the flame and spread the onion podi mix over the idly on one side or either side.


Serve the Idly hot. I bet you will like this, if you like podi idly.


This was the long break i took in blogging. I slowly detached myself from this place. I should not have done that, but blame my least interest in cooking. i very rarely tried new dishes in this break. but my blogging aspiration was always there in me. i kept telling me that i should start again. and here i am. Today i want to thank my two friends Sharmilee and Nirmala. They both bothered and asked me to resume blogging. I Owe you both a tight Hug! even my Son asked me to blog. He is proud of me for blogging and keeps checking the site, for the number of visitors and their countries. this way he could recognize few countries flag!  


This Methi Paneer is one that was sleeping in my desktop for some time. today when i saw a paneer recipe somewhat similar to this recipe. my interest kindled and here i am sharing it with you all.


Ingredients:

Paneer - 200 gms
Small Methi leaves - 1 small bunch
Green peas - 1/4 cup
Ghee - 1 tsp
Ginger - 1' inch size
Big Onion - 1 (finely chopped)
Fresh cream - 1/4 cup

To grind:

Kasa Kasa - 2 tsp's
Cashews - 5

Ghee - 1/4 tsp
Cardamom - 2
Cinnamon stick - 1/2 ' inch
Onion - 1
Green Chilly - 2

Method:


Soak the kasa kasa and cashews in warm water for about 30 minutes. Heat a pan, add ghee, cinnamon stick and cardamom. then add sliced onions and green chilly. saute them till the onions turn pinkish.


Cool the sauteed onions and grind it along with soaked kasa kasa and cashew into a thick paste.


In a pan, heat 1 tsp of ghee, add finely chopped ginger and onions. saute them well. Add methi leaves and saute it till it is cooked, it just takes less than a minute to get sauteed. (when i made, i forgot to saute methi leaves, so i added later after adding grounded paste and water. it cooked in 2- 3 minutes)


Now add the Grounded paste and 1/2 a cup of water to the pan. give a good stir. add the green peas and Paneer. let it get cooked in slow flame for about 2 - 3 minutes.

Finally add in the fresh cream and give a mix and remove the pan from flame.


Serve Methi Mattar Paneer with chapathi or with mild flavored rice like jeera pulao or peas pulao.

It is so relieving to blog after all these days. Hope to blog more frequently. i do not want miss this happiness any more.