My son kept asking me, why don't try to make crisp dosa's like in hotels. when i was able to make good dosa's today, i cant postpone in sharing the recipe with you. so on breaking my month long gap, here i am. I got a Happy News to share with you all. Yes finally my blog got its own domain name. I am proud and happy looking my blog with .com extension. Thanks to my blog readers and blog friends for all the encouragement. 


Coming to this hotel style dosa, got the recipe from Revathi Shanmugam's Tiffin Varieties book. I just gave a try and the dosa's turned out pretty good. When i tasted, it was more like karnataka / mysore style dosa in taste. the colour of the dosa is nice golden colour, which may be because of adding sugar. This dosa batter will work fine, if you are planning masal dosai for your guests.


Hotel Dosa Recipe

recipe from revathi shanmugam's tiffin varieties
makes about 25 dosa's
soaking time : 4 hrs
fermentation time: 8-10 hrs.
------------------------------------------------------------------


Hotel Dosa Recipe

Prep Time40 mins 
Cooking Time: 05 mins  
Serves6
Recipe CuisineIndian
Recipe TypeBreakfast


Ingredients:


Par boiled rice / puzhungal arisi - 2 cup's
Raw rice / pacha arisi - 1/2 cup
Urad dal - 1/2 cup
Toovar dal - 1 tbsp
Chana dal - 1 tbsp
Fenugreek - 1 tsp
Sugar - 1 tsp
Salt - 1 tbsp


    Method:

    Wash and soak the rice, dal' s, and fenugreek together. soak them in water for about 4 hours.

    After soaking grind them into a smooth batter. add little water while grinding to get the smooth batter. You can use your mixie to grind. i used mixie and it just took 5 minutes to finish the grinding work. transfer the batter to a big bowl, so that it has space when the batter doubles on fermentation. add salt to the batter and let it ferment on your kitchen top for overnight or 8-10 hours.

    After fermentation mix the batter well and add sugar to the batter and give a mix.

    Heat a dosa tava, sprinkle few drops of water to find the tava got heated up or not. the water should sizzle and evaporate soon. then add a drop of oil and use a slice of Brinjal or a potato to spread the oil on the tava.

    Pour 2 heaped laddle full of batter to the centre of the tava and make a big circle with the help of laddle. spray oil to the sides of the dosa and let it turn golden colour and flip the dosa so that the other side is also cooked. it takes 90 seconds for each dosa to be cooked at high flame.

    Serve hot with sambhar or chutney. i will soon share my hotel sambhar recipe with you.


    Its such a easy recipe, of soaking rice and dal's together and grinding them together, instead of grinding separately.  also the dosa turns out crispy and comes in nice golden colour. but eat the dosa hot. its not good, when the dosa gets cooled down!!

    One of my friend had tried twice this dosa, after i had posted here. it seams her family loves this dosai!


    Summer is at its peak here. Nothing seams to be interesting in this climate than the curd rice for me and my son. this carrot rice is my son's favorite.


    Ingredients:

    • 2 cup's of Basmati Rice (soaked in water for about 20 minutes)
    • 2 carrot 
    • 1 tbsp of oil
    • 1/2 tsp of mustard 
    • 1 tsp of split urad dal 
    • 1 sprig Curry leaves 

    Ingredients for Masala powder:

    • 1/2 cup channa dal
    • 1/2 cup dry red chillies
    • 1/4 cup urad dal
    • 1/4 cup dhania / corriander seeds
    • 1/4 cup dessicated dry coconut / kopparai thengaai
    • 1 tbsp cumin
    • 1/4 tsp fenugreek
    • 1 inch cinnamon
    • 2 cloves
    • 1 tbsp khasa-khasa / poppy seeds
    • 2 sprigs of curry leaves
    • 1/2 tsp hing


    Summer Lunch with Carrot rice and chilled cut fruits Mango and Pappaya

    Method:

    1. Dry roast the ingredients in medium flame one by one. start with chana dal, urad dal, dhania. then dry roast cumin, fenugreek, cinnamon and cloves, khasa-khasa. following roast the dry coconut in slow flame. then roast the dry red chillies, curry leaves and hing separately.

    2. Cool the roasted ingredients. using your mixie, make them into a fine powder.

    3. Store the masala powder in an air tight jar. use it within a month, as it has dry coconut or store in your fridge.

    4. Soak the basmati rice for about 20 minutes in sufficient water, drain the water and cook basmati rice with 1 and half cup's of water. i used my microwave and cooked in 1 and half cup's of water for about 12 minutes at 900w. rice and water ratio is 1 : 1 and 1/2. you can cook the rice on stove top with the same ratio. cool the cooked basmati rice in a wide bowl. mix 1 tsp of sesame oil to the rice and give a soft stir with a fork, so that the grains separate.

    5. Peel the skin of the carrot. wash them and soak in hot water for about 10 -15 minutes. this is to help grating the carrot smoothly. after 15 minutes of soaking, grate the carrot's and set aside.

    6. Heat a pan, add oil, when its heated, add mustard and let it splutter. then add urad dal and curry leaves. now add the masala powder and salt to the oil and roast the masala powder for just a few seconds in slow flame. then add salt and mix well along with the masala.

    7. Add the cooked basmati rice and mix with the masala's. then add the grated carrot and mix slowly, so that you do not break the rice grains. remove from flame and transfer to the serving bowl.


    Notes:

    1. The masala powder can also be used to prepare capsicum rice and cabbage rice.

    2. Use a pinch of turmeric powder, that makes the difference in color of the rice.


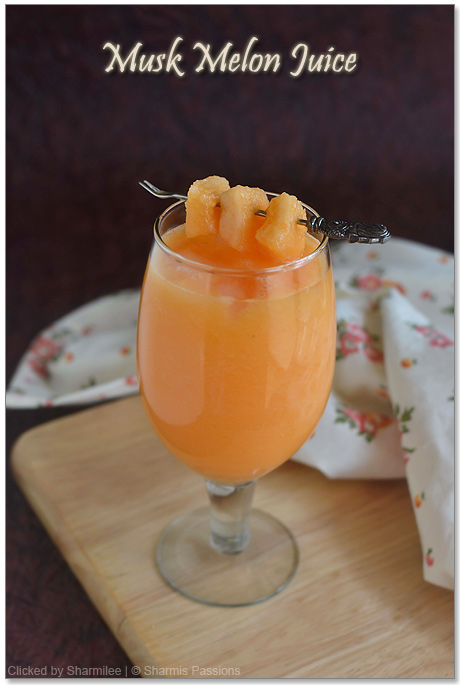
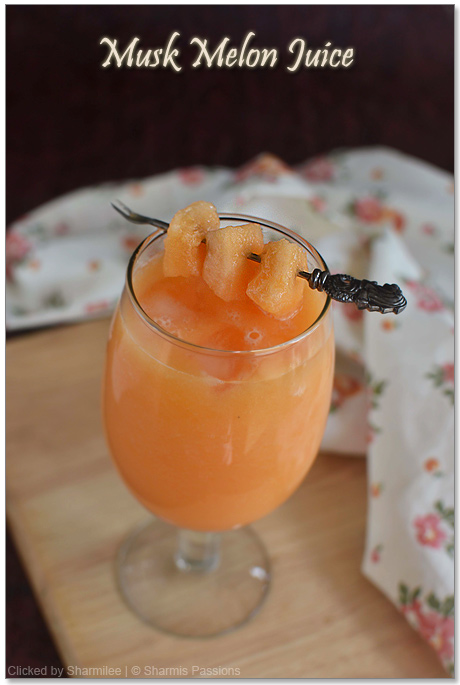
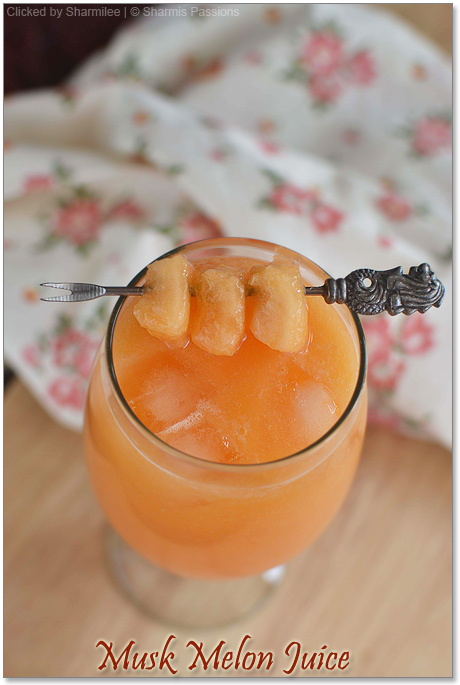
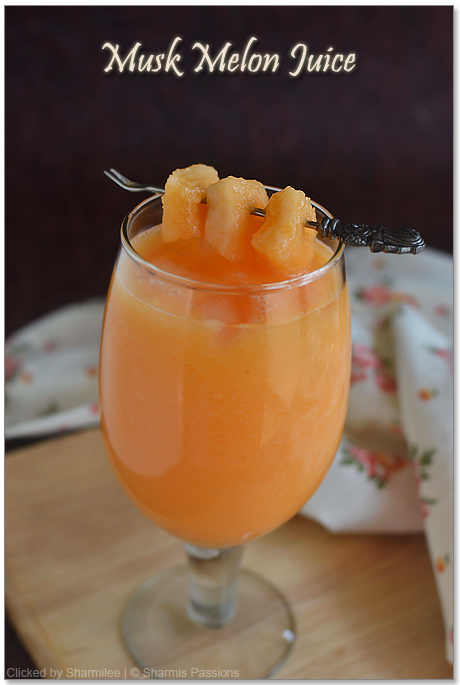
    Blogging introduced me a Good friend Sharmilee of Sharmi's Passions. We shared our numbers to speak on oven 3 years back. You can see her baking passion now. Whenever i give a break in blogging, she gives me a call and ask me to blog regularly. you believe it or not, i just go and blog breaking the gap. and the first comment will be from sharmi! That way i am blessed to have a good blogging friend. She always give me the key to break my laziness or my suffocation at times. On one of our casual talk's, i asked her for guest post, she immediately agreed and send me the full edited post in just a week time. I wish i get at least quarter of her energy and passion towards sharing recipe! oh, i just love her pictures. look at this gorgeous peach color juice, so lovely! Thank You Sharmi for being here!!!


    Musk Melon Juice


    Musk Melon also known as Kirni pazham in tamil. it is said to be a thirst quencher. people have this juice in summer. such a popular juice in tamil nadu in summer season. Over to Sharmi now...


    I got to know Lavi when I was desperately seeking advice for my oven purchase. I am greatly thankful to her for guiding me to get the right oven. Days passed by, and we spoke over phone....we discussed over food, blogging, photography and about family too. A day came when we had chance to meet too....:)

    She never failed to motivate me right from the beginning and as a new blogger the extra push was much needed.

    When she approached me for a guest post I couldn't wait to do it and she asked for any beverage recipe. I left the choice to her.....A week later she came back with the choice of musk melon juice and here is the post for you :)

    She always appreciates my drinks/beverages pics and that put me an extra responsibility of doing justice to the click for her guest post too. Hope you like it Lavi!

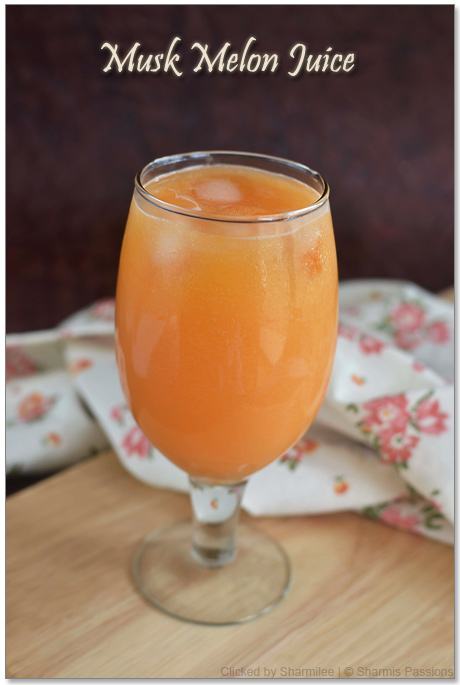
    Musk Melon Juice

    Musk Melon Juice Recipe Ingredients
    • Musk Melon - 1 
    • Lime Juice - 1 tbsp
    • Sugar - 2 to 3 tbsp
    • Honey - 1 tsp(optional)

    Musk Melon Juice
    Method

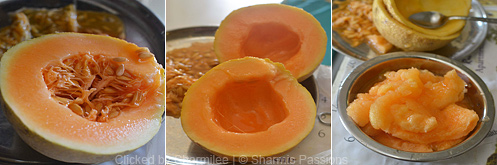
    First cut the fruit into 2 halves. Then scrap the center seed part and discard it. Then scoop out the flesh part.

    Musk Melon Juice - Step1Add sugar, honey and lemon juice and blend it to a smooth mixture. If you find it too thick add little water.
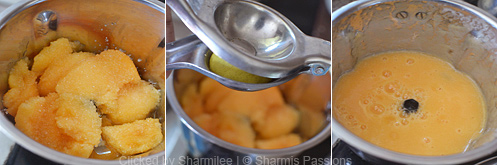
    Musk Melon Juice - Step2

    Musk Melon Juice
    My Notes:
    • Serve it immediately after making the juice.
    • You can skip lemon juice and add just honey and sugar for making the juice.
    Musk Melon Juice

    I know many of you might have tried out this date cake from shilpa's blog. i am joining you lately. When Nupur mentioned about the date cake in her last post, i could not resist to lay my hands on it. it was so easy to prepare, no tricky stuff's. and the outcome of the cake is just amazing. I shared the cake with my neighbors and friends. almost everyone wanted to go in for a second slice, after hearing its name"Eggless Date Cake". 


    I tell you what, if you serve this cake topped with ice cream, then this will be the winning dessert. before clicking pictures, i took a warm slice with a scoop of vanilla ice cream and enjoyed it to the core. to my surprise this resembled much like an chocolate cake only in its look's. i used both seedless brown and dark dates. when my hubby and another friend tasted and told it tasted like adhirasam, i was surprised, yes it tastes like adhirasam. 


    if i had to give a name, i would call it as Eggless non sticky date cake. the cake was moist and was just perfect!


    I just followed shilpa's recipe. 
    Referred sharmi's blog for step wise pictures.
    Yields about 8 slices.

    Ingredients:

    • Dates - 18 ( brown or black seedless)
    • Milk - 3/4 cup
    • Sugar - 3/4 cup
    • Maida / All Purpose flour - 1 cup
    • Oil - 1/2 cup ( i used sunflower oil)
    • Baking soda - 1 tsp
    • Cashews and Badam - 5 each (chopped)

    Method:

    1. Bring the milk to boil. remove the milk from flame. after 5 or 10 minutes, when the milk is still warm, add in the dates. let the dates soak in milk for about 1 hour. you can also leave it soak overnight in your fridge.

    2. Transfer the soaked dates along with milk into your mixie jar, add sugar and blend well into a smooth paste. add oil and blend again. pour the mix into a large mixing bowl.

    3. Sieve the maida flour along with baking soda twice so that the baking soda mixes evenly with the flour.

    4. Now add the sieved flour to the mixing bowl, which has grounded date-milk mix. add the flour gradually and keep mixing with a spatula or a wooden spoon. make sure you do not create any lumps. the finally add in the chopped nut's and give a mix with spatula.

    5. Line in your baking tray or a round tin with butter paper. grease the butter paper with little butter and add 1/2 tsp of flour to dust the greased. pour in the cake batter to the baking tin.

    6. Pre-heat your oven to 180C / 350F for 10 minutes. put the baking tin into the oven and bake for about 35-45 minutes, till a toothpick inserted comes out clean.

    7. Once the cake is done, let it cool for 5-10 minutes and slice it and serve with vanilla ice cream.


    Notes:

    1. I turned over enthusiastic while preparing the cake batter and totally forgot to line in my baking tin. end result, the cake sticked to the tin. so line in your baking tin with butter paper.

    2. You can use olive oil and brown sugar in place of oil and sugar to make the cake more healthier.


    I am not a coffee person till last year. I started taking coffee while i prepare filter coffee for my domestic helper. who can resist filter coffee? I  do not know to prepare coffee during my hostel days. my friends help me out with decoction and mixing. 


    I remember once i had to tell on how to make filter coffee in my class 11 for english viva. when i told, "mix coffee powder with hot milk", everyone in the class started to laugh. When my English teacher started to yell at me, i was just blinking, as i thought that i told the right one. but when the other girl started to tell, i realized, oh there are so many steps in it. which i finished in just one step. sorry to bore you with my memories. 


    So with this hot climate, i wanted to have cold coffee. i looked many sites, finally this chocolate coffee attracted me. chocolate y coffee is what i arrived at. 


    To prepare chocolate sauce:


    Ingredients:


    • Dark chocolate - 25 gms / 1/4 cup
    • Butter - 1/2 tbsp
    • Sugar / brown sugar - 3 tsp
    • Salt - a small pinch
    • Honey / Corn syrup - 1 tsp
    • Milk - 3 tbsp

    Method:

    1. To prepare chocolate syrup, it should be cooked using double boiling technique. so never cook chocolate in direct heat as it may burn the chocolate. 

    2. For double boiling, take a wide vessel filled half with water. boil the water. take another medium sized bowl that could sit inside the wide vessel. 

    3. Put the dark chocolate, sugar and milk to the medium sized bowl sitting over the boiling water on a wide vessel. reduce the flame to low and start stirring with a wooden spoon till the chocolate melts and blends well with milk.

    4. Once the chocolate had melted, add honey and butter. keep stirring and in less than 2 minutes the chocolate sauce get thicker. on cooling it may get still thicker, so take it off, while the sauce starts thickening.

    5. The chocolate sauce will be looking shiny and you can feel it getting thickening. remove it at that point.

    I prepared the chocolate syrup a while back and totally forgot.  here is when i prepared last.

    To prepare cold chocolate coffee

    Ingredients:
    • Chilled milk - 1 tall glass (boiled and chilled)
    • Instant coffee powder - 2 tsp  (or)
    • Filter Coffee decoction - 2 tbsp
    • Cocoa powder - 1/2 tsp
    • Sugar - 2 or 3 tsp
    • Chocolate syrup - 1 tsp

    Method:

    1. Take a serving glass and drizzle the chocolate syrup into it to create patterns. tilt the glass so that syrup flows and the patterns get set.

    2. In your mixie jar, add milk, sugar, coffee powder or decoction, cocoa powder and blend well.

    3. Now pour the cold coffee into the chocolate syrup drizzled glass and serve chilled.


    I know morning walk gives lot of energy, but i am so so lazy to wake up early. i sometimes drop my son at school and walk back home. on the way, i will be tempted to buy fresh greens and vegetables from the roadside vegetable sellers. one day these sorrel leaves/pulicha keerai/gongura/amarnath leaves caught my eye. so with gongura pappu in mind bought a bunch and came back home.


    I was very clear to refer Mahanandi for recipe. I love her way of telling the recipe, it will be a detailed recipe told in way, just as our mom or grand mom tell's us. I adapted the recipe little bit and my dal turned out perfect.


    minced garlic, green chillies, shallots, toor dal and gongura ready  to get started.


    meal with gongura pappu, vendakkai poriyal and curd


                                                     Gongura pappu / Pulicha keerai masiyal


    serves - 2
    prep and cooking time - less than 30 mins
    recipe adapted from The Mahanandi

    Ingredients:

    • Gongura leaves - 1 bunch
    • Toor dal - 1/2 cup
    • Shallots / small onions - 15
    • Green chilli - 4
    • Garlic - 4
    • Turmeric powder - a pinch
    • Oil - 1 tsp
    • Asafoetida / perungayam / hing - 1/4 tsp
    • Water - 1 cup
    • Salt to taste
    for tempering
    • Ghee - 1 tsp
    • Mustard - 1 tsp
    • Split urad dal - 1 tsp
    • Dry red chilli - 2


    Method:

    1. Remove the gongura leaves from the stem and wash the gongura leaves twice or thrice thoroughly. chop or tear the leaves into three pieces. 

    2. Wash the toor dal in a bowl to be kept in pressure cooker and strain away the water. add the chopped gongura leaves to toor dal. then add minced garlic, slitted green chilli, 1 tsp oil and small onions. add water, turmeric powder and hing. mix well. Pressure cook for upto 5 whistles. 

    3. Cool down the pressure cooked dal with gongura for at least 10 minutes. then transfer the pressure cooked contents to the mixie jar and use your pulse button to give one or two pulse shot. add salt to taste and give another mix. once the dal mixes well with gongura, onions and other ingredients, remove the gongura pappu to a serving bowl.

    4. In a small tempering pan, add 1 tsp of ghee and add mustard, split urad dal and dry red chilli. add the tempering to the dal / gongura pappu.

    5. Serve along hot rice along with appalam.

    Note:

    I added just 2 green chillies and found sourness dominated, so add more chillies 4 or 5 depending on your spice need.


    For the past few months, i have been making biryani regularly during weekend's. its easy to prepare biryani rather than making a meal with sambhar, curry and a poriyal. other than that cleaning becomes easy with this one pot meal. i just clean up, watching the time when the biryani cooks up in the cooker.


    This is simple biryani recipe than the previous biryani i posted. i hate sour taste in biryani. sourness is because of tomatoes and curd added to it. i have not used tomatoes and curd in this recipe. this is one of our favorite biryani. adding coconut milk to biryani makes it more rich and tasty.


    Summer is at its peak here. drinking tender coconut becomes a daily routine. Hubby Dear just bought tender coconut and was making me drink, while i was clicking the pictures. i even used the coconut for clicking :) that is the bad habit of being food blogger.


                                                                   Vegetable Biryani with Coconut Milk


    serves - 3
    preparation time - 20 minutes
    cooking time - 25 minutes              


    Ingredients:
    • Basmati rice - 300 gms
    • Chilli powder - 1 tsp
    • Garam masala - 1/2 tsp
    • Ginger garlic paste - 2 tbsp
    • Corrainder leaves - 1/2 cup
    • Pudhina / mint leaves - 1/2 cup
    • Coconut milk - 2 cups / 200 ml. (coconut milk extracted from 1/2 coconut)
    • Water - 2 and half cup
    • Oil - 2tbsp
    • Ghee - 2 tbsp
    • lemon juice - 1 tsp
    Vegetables
    • Big onions - 3
    • Potato - 1
    • Carrot - 2
    • Green peas - 1/4 cup
    • Beans - 8
    • Cauliflower florets - 5
    • Green chilli - 3
    Spices 
    • Bay leaf - 1
    • Saunf / sombu  - 1 tsp
    • Cinnamon - 1' inch
    • Cloves - 3
    • Maratto mokku - 1
    • Star Anise - 1

    Method:

    1. Soak Basmati rice in water for about 15-20 minutes. then drain the water and set aside the basmati rice. Peel the skin of carrot, potato and chop them in cube shapes. chop beans and have it separately. wash the cauliflower well, put them in hot water , drain it and set aside. Chop the onions into thin slices and slit the green chilli and have it aside.

    2. Heat a wide bottomed pressure cooker, add oil and ghee. then add the spices one by one. once the spices are roasted, add onions and green chilli. saute the onions in medium flame for about 3-4 minutes till it turns pink and translucent. then add the corriander leaves and mint leaves and mix well. add the ginger garlic paste to the cooker and mix well, till the raw smell leaves off.

    3. Now add the vegetables, carrot,beans,potato and green peas. reserve the cauliflower to add at last so that it do not overcook and turn mushy. now add the chilli powder and garam masala, salt to taste and mix well.

    4. Then add 2 cup's of coconut milk and 2 and half cup's of water and mix well with the vegetables. then add basmati rice and give a good mix. finally add lemon juice and cauliflower and mix well.

    5. Pressure cook the biryani in medium flame for about 2 whistles or without the cooker weight exactly for 12 minutes in medium flame. 

    Serve the biryani hot with onion or cucumber raita.


    Note:

    Coconut milk can be added more. remember to measure the coconut milk. for 1 cup of basmati rice, coconut milk should be 1 and half cup.